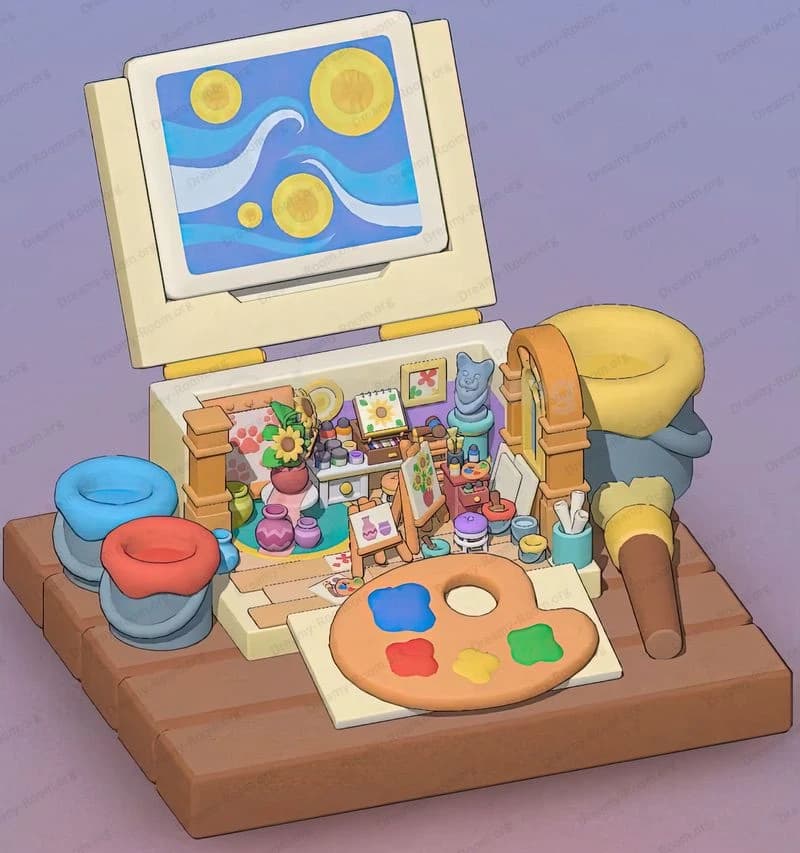
Dreamy Room Level 163
Dreamy Room Level 163 guide - Dreamy Room 163 Walkthrough & Solution.

Important Notice Regarding Level Numbering
Due to frequent changes in Dreamy Room's level numbering and differences between platforms (Android/iOS) – for example, level 163 on Android might not be the same as level 163 on iOS – the text guide below may not always match the images and video above. Please prioritize the image and video guides. If you find that the guide content doesn't match your current level, please visit the All Level Walkthroughs page to find the correct guide based on level images. Thank you for your understanding.
Dreamy Room Level 163 Walkthroughs & Guide
Step 1. Place the left and center wall cabinets with range hood
In Dreamy Room Level 163, the very first action is to position the left tall cream-and-yellow wall cabinet flush against the left wall panel. In Dreamy Room Level 163, accuracy at this stage is crucial: slide the cabinet slowly so its edges align perfectly with the corner seam of the beige walls. Next, in Dreamy Room Level 163, attach the central cabinet featuring the mint-green drop-down range hood directly to the right of the first unit, ensuring the decorative molding at the top lines up seamlessly. In Dreamy Room Level 163, you must confirm that both cabinets sit level on the patterned floor, with the knobs facing outward. Finally, the main challenge in Dreamy Room Level 163 is identifying how these pieces interlock without gaps—take a moment to toggle your camera angle before locking them into place.
Step 2. Position the right wall cabinet and refrigerator
In Dreamy Room Level 163, after securing the left and center modules, shift focus to the right wall and set the second tall cream-and-yellow cabinet flush with the corner. In Dreamy Room Level 163, this right cabinet must sit directly adjacent to the aqua refrigerator unit, creating a continuous kitchen wall. Slide the mint-turquoise fridge into place, making sure its curved handle faces inward toward the room’s center. Dreamy Room Level 163 demands precise alignment here: the top of the fridge should match the cabinet height so the overall profile remains cohesive. Always leave a small gap at the base for the patterned floor to peek through. In Dreamy Room Level 163, this step establishes the vertical symmetry of your kitchen façade, so double-check from multiple angles before moving on.
Step 3. Install the stove, cookware, microwave, and potted succulent
In Dreamy Room Level 163, the next focal point is the countertop beneath the range hood. Carefully place the mint-green stove unit directly below the hood, centering the burners in the alcove. In Dreamy Room Level 163, functionality infuses style: position the purple cooking pot on the left burner, then arrange the two small blue teapots side by side to the right of the pot. Next, in Dreamy Room Level 163, slide the aqua microwave onto the left lower shelf of the brown base cabinets, ensuring it clicks into place. Finally, place the small potted succulent on the countertop beside the microwave—this accent balances the cool pastel palette. Dreamy Room Level 163 challenges you to maintain even spacing and forward-facing orientations for every piece, so fine-tune each item’s angle before locking it in.
Step 4. Add the freestanding shelf with cat figurine and photo slots
In Dreamy Room Level 163, locate the wooden brown rack and position it flush against the right wall panel. In Dreamy Room Level 163, the topmost surface is reserved for the golden cat figurine; gently lower it so the cat’s body faces the room entrance. On the middle tier, insert the two photo slots at a slight backward tilt so the frames rest snugly. Dreamy Room Level 163 requires that the diagonal shelves sit at identical angles for visual consistency. Below, arrange the trio of blue glass bottles evenly on the lower shelf, spacing them equally from edge to edge. In Dreamy Room Level 163, make sure the single drawer underneath is fully closed and aligned, reinforcing the polished, storybook look of the completed shelf unit.
Step 5. Position the central island module with sink and faucet
In Dreamy Room Level 163, center the cream-and-yellow island table over the faint diamond motif in the floor tile. Gently lower the island until its base sits flush, keeping equal clearance on all sides so it doesn’t bump surrounding furniture. In Dreamy Room Level 163, install the golden faucet into the island’s built-in sink by pressing it firmly into the mounting hole, then rotate the spout to face inward over the basin. Dreamy Room Level 163 demands that this faucet snaps into place without wobble—listen for the click. Finally, verify that the sink basin is clear of debris and that the faucet rotates smoothly, a subtle but vital detail in Dreamy Room Level 163’s meticulous design.
Step 6. Arrange the fruit bowl, vegetable basket, and cake slices on the island
In Dreamy Room Level 163, decorative garnishes bring warmth to the central island. Place the wooden fruit bowl filled with grapes and apples on the island’s front-left corner, angling it slightly toward the room’s entry. In Dreamy Room Level 163, position the green woven vegetable basket with carrots and leafy greens directly behind the fruit bowl, aligning its handle parallel to the tabletop edge. Then set two slices of pink cake on aqua plates along the right edge, spacing them evenly. Dreamy Room Level 163’s core puzzle lies in balancing color and symmetry: each item must be equidistant so the layout reads as a unified vignette. After placement, step back to confirm that this trio enhances the pastel harmony of Dreamy Room Level 163.
Step 7. Arrange seating: dining chairs, cat figure, and small stool
In Dreamy Room Level 163, you now add the seating that invites imaginary inhabitants to linger. Slide the cream chair with the ornate backrest to the near-right side of the island so its seat faces the sink. In Dreamy Room Level 163, place the gray cat figurine seated upright on the opposite side of the island, ensuring its tail curves naturally along the edge. Position the small wooden stool under the island’s overhang on the left, nesting it neatly against the base. Dreamy Room Level 163’s main challenge here is maintaining even spacing between seating options so no piece feels crowded. Finally, nudge each seat slightly until you feel the arrangement strikes the perfect balance of whimsy and realism.
Step 8. Decorate with vases, pitcher, mugs, and a book
In Dreamy Room Level 163, the final tabletop accessories elevate the room’s cozy narrative. On the right-front corner of the island, place the blue ceramic pitcher on its wooden tray, then arrange the three matching mugs beside it with handles facing outward. In Dreamy Room Level 163, situate the yellow vase filled with purple flowers on the bench table to the room’s right, centering it on that surface. Finally, rest the closed red book at the front edge of the island next to the tray. Dreamy Room Level 163 rewards attention to detail, so adjust each item until their spacing feels both deliberate and lived-in, enhancing the gentle pastel story you’ve created.
Step 9. Mount wall sconces, hanging plant, and framed picture
In Dreamy Room Level 163, adding vertical accents completes the ambiance. Clip the left blue wall sconce onto the left panel about six inches from the corner so the lamp shade points downward. In Dreamy Room Level 163, mirror this placement on the right panel next to the freestanding rack. Next, hang the cascading green potted plant directly beneath the right sconce, ensuring the vines drape naturally. Finally, slot the framed picture between the refrigerator and shelf unit at mid-height, centering it on the panel. Dreamy Room Level 163’s challenge is achieving perfect symmetry; use your camera controls to verify that all fixtures line up in relation to the cabinets.
Step 10. Final touches: place the floor vase of blue roses
In Dreamy Room Level 163, nothing grounds the space like a lush flower display. Position the large yellow vase filled with blue roses at the front center of the room near the glass railing, making sure it sits squarely on the patterned tile. In Dreamy Room Level 163, angle the bouquet slightly toward the island to draw the eye inward. Adjust individual blossoms so they fan out naturally without overlapping the vase rim. Finally, step back in Dreamy Room Level 163 and survey your entire arrangement—this last check secures the harmonious composition that defines a perfectly decorated Dreamy Room Level 163.
Notes and Precautions for Dreamy Room Level 163
In Dreamy Room Level 163, accuracy is paramount: every object must snap precisely into its designated spot, or the completion prompt won’t appear. Always zoom in on placement areas to align items with the faint grid lines etched into the patterned floor. Dreamy Room Level 163 offers subtle visual cues—slight outlines or glows around valid attachment points—so watch for these guides before clicking. Be careful not to overlap pieces: if two items merge, use the undo command and re-position with a small gap in Dreamy Room Level 163. Avoid rushing; the game imposes no timer, and in Dreamy Room Level 163, patience yields perfection. If an item refuses to snap, rotate your camera—Dreamy Room Level 163’s dynamic view may reveal hidden anchors. Finally, save your progress manually after major placements, as Dreamy Room Level 163 does not autosave between each action.
Tips and Tricks from top player for Dreamy Room Level 163
In Dreamy Room Level 163, veteran players start with the largest furniture pieces first to anchor their layout. By placing the wall cabinets and refrigerator before countertop accessories, you create a framework that streamlines later steps in Dreamy Room Level 163. Use camera tilt and pan controls—when you adjust the angle, Dreamy Room Level 163 might reveal hidden snap points for tricky attachments like the range hood. Keep object orientation in mind: flipping items early in Dreamy Room Level 163 saves time on corrections later. For color harmony in Dreamy Room Level 163, group similar hues—greens near the stove, blues on the shelf, and yellows with the vases. Leverage the quick-slot toolbar to bind favorite items for one-click placement; Dreamy Room Level 163 veterans swear by this shortcut. Lastly, practice layouts in sandbox mode to sharpen your spatial understanding before tackling the real Dreamy Room Level 163.
Final Scene Description
The completed Dreamy Room Level 163 presents a harmonious pastel haven where every cabinet, appliance, and decorative piece lives in perfect balance. On the left wall, a cream-and-yellow tall cabinet joins a mint-green range hood above a matching stove, while on the right, an aqua refrigerator stands beside a brown shelf topped by a golden cat figurine. Soft blue wall sconces and a hanging plant frame these fixtures with a gentle glow. Centered on the patterned floor is a cream island table with a golden faucet, surrounded by a fruit bowl of grapes and apples, a woven vegetable basket, and two slices of pink cake. Seating includes a cream chair, a gray cat figure, and a wooden stool. Additional accents—a yellow vase of purple blossoms, a blue pitcher with matching mugs on a tray, a red book, and a floor vase of blue roses—complete the scene, showcasing Dreamy Room Level 163’s tranquil storybook ambiance.


