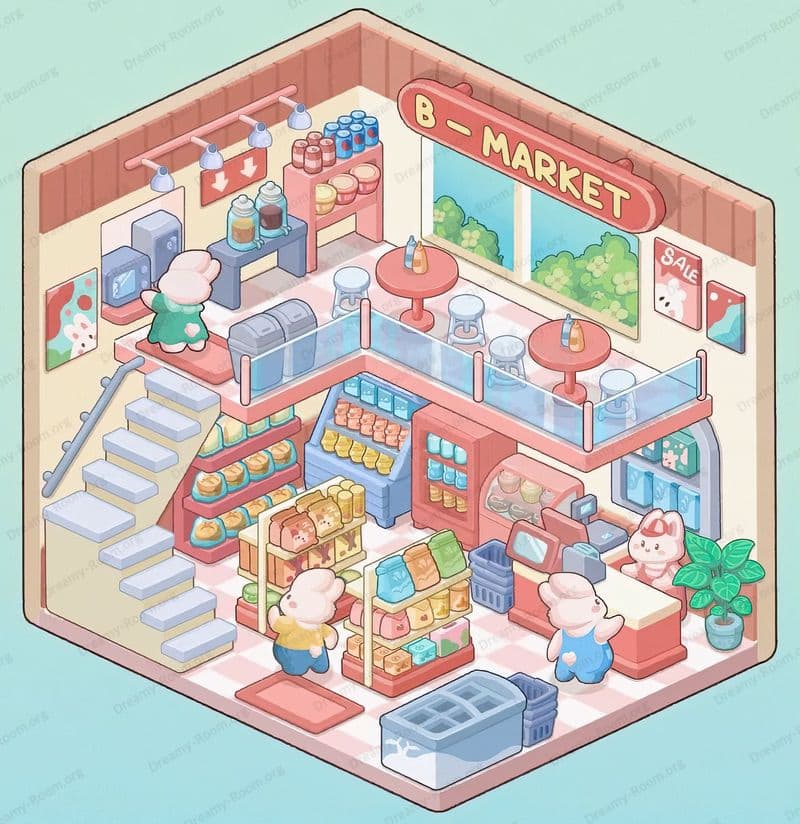
Dreamy Room Level 128
Level 128 guide walkthrough, helping players solve puzzles and explore the wonderful world of Dreamy Room.

Important Notice Regarding Level Numbering
Due to frequent changes in Dreamy Room's level numbering and differences between platforms (Android/iOS) – for example, level 128 on Android might not be the same as level 128 on iOS – the text guide below may not always match the images and video above. Please prioritize the image and video guides. If you find that the guide content doesn't match your current level, please visit the All Level Walkthroughs page to find the correct guide based on level images. Thank you for your understanding.
Dreamy Room Level 128 Walkthroughs & Guide
Step 1. Place the whipped cream drape around the top rim of the dome.
When you begin, the empty space presents a soft pink and purple dome ready for transformation in Dreamy Room Level 128. Your first major task in Dreamy Room Level 128 is to carefully place the pastel whipped cream drape around the entire top rim of the dome. This whipped cream drape should hug the curve of the rim, forming smooth peaks and gentle valleys that echo the pastel gradient background of the room. Take your time in Dreamy Room Level 128 to adjust the height of each peak so that it looks consistent across the front and sides of the dome. Accurate placement in Dreamy Room Level 128 will ensure that subsequent decorations like sprinkles and the cherry will adhere properly and create a cohesive final scene.
Step 2. Place the sprinkle rods and star sprinkles on the whipped cream drape.
After securing the whipped cream drape in Dreamy Room Level 128, the next objective in Dreamy Room Level 128 is to adorn the drape with a mix of colorful sprinkle rods and tiny star sprinkles. You will find two sets of rod-shaped sprinkles in green, red, and purple hues. Carefully tap each sprinkle rod onto the whipped cream surface, spacing them evenly across the drape so that no section looks overcrowded or sparse. The playful arrangement in Dreamy Room Level 128 should feature rods pointing in various directions to mimic natural candy scattering. Then add the small yellow star sprinkles between the rods, filling any gaps while avoiding clumping. This step in Dreamy Room Level 128 sets the stage for the cherry centerpiece and ensures a balanced, festive look.
Step 3. Place the glossy cherry at the apex center of the whipped cream.
With the sprinkle arrangement secured, Dreamy Room Level 128 guides you toward placing the glossy cherry at the apex of the whipped cream dome. In Dreamy Room Level 128, the cherry is a standout piece that serves as the focal point for the entire room. Gently drag the cherry to the very top center of the whipped cream drape and ensure it sits firmly in the deepest valley between two peaks. The cherry stem should lean slightly toward the back right to mimic a natural placement. This positioning in Dreamy Room Level 128 will cast subtle shadows on the whipped cream and enhance the 3D effect. Taking a few extra seconds to reposition the cherry in Dreamy Room Level 128 can dramatically improve the balance and symmetry of your final scene.
Step 4. Hang the pastel picture frames on the left interior wall.
Behind the counter and slightly left of center, two pastel picture frames transform the bare interior wall into a cozy backdrop in Dreamy Room Level 128. As the fourth step in Dreamy Room Level 128, select the taller white frame first and click to mount it at eye level, approximately one-third of the way from the left edge of the wall. Next, choose the shorter turquoise frame and position it directly below the white frame, leaving a small gap of about half an inch. Ensuring the alignment is parallel in Dreamy Room Level 128 helps maintain visual harmony. Adjust each frame in Dreamy Room Level 128 until they sit flush against the wall and the edges line up vertically. Proper placement here reinforces the storytelling atmosphere of this level.
Step 5. Lean the decorative skis against the left interior wall.
In this next portion of Dreamy Room Level 128, the game challenges you to add a pair of slender decorative skis to the left corner of the interior wall. To start step five, locate the wooden skis in your inventory and drag them to rest against the same wall where the picture frames hang. Angle the skis slightly outward so that their tips point toward the top left of the dome, giving them a natural, leaning appearance. Ensuring the skis maintain parallel spacing in Dreamy Room Level 128 helps create balance beside the frames. Adjust the vertical alignment in Dreamy Room Level 128 until the ski bottoms sit just above the base of the counter. Accurate placement of skis in Dreamy Room Level 128 complements the winter theme and anchors the left side of the room.
Step 6. Position the golden reindeer figurine on the L-shaped counter.
After placing the skis, Dreamy Room Level 128 prompts you to decorate the counter surface with a shimmering golden reindeer figurine. In Dreamy Room Level 128, you’ll find the reindeer icon among your decorative pieces—select it and drag it to the front-left corner of the L-shaped counter. Center it between the base of the skis and the front edge of the counter to give it prominence. Rotate the figurine slightly toward the room’s center to showcase its antlers and metallic sheen. Carefully adjust its position in Dreamy Room Level 128 so that its hooves rest flush on the surface and its antlers do not collide with the skis. Correct placement in Dreamy Room Level 128 enhances the cohesive winter display and adds a focal point to the counter area.
Step 7. Arrange the gift items on the counter.
Continuing the counter decorations in Dreamy Room Level 128, you’ll now arrange two gift items gracefully. Begin by selecting the small green square gift box with a red ribbon. Drag it to rest to the immediate right of the golden reindeer, leaving a small space so each piece stands out. Next in Dreamy Room Level 128, pick up the lavender tote bag and position it at the front-left corner of the counter, slightly angled toward the center of the room. Adjust both items in Dreamy Room Level 128 to ensure they are aligned with the counter edge and do not overlap each other or the figurine. Strategic placement in Dreamy Room Level 128 will balance the counter’s left side and prepare for the next shelving additions.
Step 8. Place the vertical shelving unit and its items.
In Dreamy Room Level 128, after balancing the counter, you will add a slim vertical shelving unit to the rear-left corner. To do this, select the tall wooden shelf piece and snap it into place against the back bar of the L-shaped counter. This setup holds three delicate decor items. Next in Dreamy Room Level 128, pick up the small heart-adorned jar and place it on the top shelf. Then add the tiny green gift box to the middle shelf in Dreamy Room Level 128, followed by a stack of pastel mini-buns on the bottom shelf. Carefully adjust each object in Dreamy Room Level 128 so that they are centered on their respective shelves, showcasing them without overlap.
Step 9. Install the horizontal glass shelves above the vertical unit.
With the vertical unit in place, Dreamy Room Level 128 directs you to install two horizontal glass shelves on the wall above it. First, select the upper glass shelf and snap it into the slots approximately one head’s height above the countertop. Once secured, place a smooth green loaf of bread on the left side of this shelf in Dreamy Room Level 128, then select two marbled spherical buns—one pastel blue and one peach—and arrange them neatly to the right. Next in Dreamy Room Level 128, choose the second glass shelf and position it just below the first. On this lower shelf, add three assorted pastel pastries including a pink frosted ring, a green-frosted ring, and a small swirl bun. Proper alignment in Dreamy Room Level 128 ensures these elements hover safely over the counter.
Step 10. Arrange the frosted pastries on the countertop.
Following the wall displays, Dreamy Room Level 128 instructs you to arrange a row of frosted pastries along the right section of the countertop. First select the pink frosted ring-shaped donut and place it at the far left of the counter opening, just beneath the bottom horizontal shelf. Next, choose the green-frosted donut in Dreamy Room Level 128 and shift it rightward so it sits snugly beside the pink one. Then grab the small swirl bun and position it to the right of the green donut in Dreamy Room Level 128, ensuring a consistent one-centimeter gap between each pastry. Finally, add the seashell-shaped pastry at the end of the line. Accurate spacing in Dreamy Room Level 128 helps the pastries look freshly arranged and inviting.
Step 11. Lay the red circular rug on the floor.
In Dreamy Room Level 128, the empty floor space beneath the right counter awaits a cozy red circular rug. To achieve this in Dreamy Room Level 128, select the bright red rug from your inventory and drag it onto the floor so that its center aligns with the midpoint of the counter’s overhang. Ensure the edge of the rug just touches the bottom edge of the countertop without slipping under the counter. Adjust its position in Dreamy Room Level 128 by rotating it slightly so that the rug’s circular shape appears perfectly round when viewed from the front. Precise placement in Dreamy Room Level 128 provides a soft foundation for the upcoming ottoman and ornament decorations.
Step 12. Place the ottoman stools on the rug.
In the next phase of Dreamy Room Level 128, you will introduce two cushioned ottoman stools onto the newly placed rug. Select the brown-top ottoman first and drag it to the left side of the red circular rug, centering it halfway between the center of the rug and the counter edge. Next in Dreamy Room Level 128, choose the red-top ottoman and position it to the right of the brown one, ensuring the gap between the two matches their width. Carefully nudge each ottoman in Dreamy Room Level 128 until their edges align parallel to the front rim of the rug. Proper alignment in Dreamy Room Level 128 ensures a balanced base for decorative items that follow.
Step 13. Set the snow globe on the left ottoman.
In Dreamy Room Level 128, the left ottoman transforms into a display stage for a charming snow globe. Begin by selecting the miniature glass globe from your inventory and carefully placing it on the brown-top ottoman. Ensure the globe sits firmly in the center of the cushion, with its base parallel to the ottoman’s edges in Dreamy Room Level 128. Rotate it slightly if necessary in Dreamy Room Level 128 to achieve a front-facing view of the miniature inside. Be mindful in Dreamy Room Level 128 that the globe’s size does not cause it to hang over the cushion’s edge. Finalizing the globe’s placement will add a whimsical touch to the display.
Step 14. Place the pink teddy bear on the right ottoman.
After setting the snow globe, Dreamy Room Level 128 turns your attention to the right ottoman for a playful pink teddy bear. To execute this in Dreamy Room Level 128, select the rosy plush bear and drag it onto the red-top ottoman. Position the bear so its legs dangle slightly over the front edge, giving the impression of a relaxed seating pose. Angle its head forward in Dreamy Room Level 128 so that its cute face faces directly toward the viewer. Make sure the red bow around its neck is fully visible. Proper positioning of the teddy bear in Dreamy Room Level 128 will enhance the room’s inviting, toy-themed charm.
Step 15. Position the Christmas tree on the rug’s edge.
In Dreamy Room Level 128, the final main decoration inside the dome is a festive Christmas tree. Select the green conical tree adorned with candy canes and red baubles and drag it to sit on the right side of the red circular rug’s edge. In Dreamy Room Level 128, align the tree base so that its trunk touches the rug edge without overlapping the ottomans. Tilt the tree slightly toward the center in Dreamy Room Level 128 to display the ornaments and star topper prominently. Make sure each candy cane and ornament is visible from the front view. Proper placement of the tree in Dreamy Room Level 128 will anchor the right side of the room and complete the seasonal tableau.
Step 16. Place the crystal blocks at the base of the counter.
To enhance the sparkling effect in Dreamy Room Level 128, your next task is to position two transparent crystal blocks at the base of the left counter. In Dreamy Room Level 128, locate the crystal block icon and drag it down so the first block sits directly under the corner where the counter meets the floor. Pick up the second crystal block and place it slightly to the left of the first, angling both outward to catch the soft pastel light. Adjust each block’s rotation in Dreamy Room Level 128 until their reflective surfaces face the room’s center. Proper placement of these crystals in Dreamy Room Level 128 adds depth and whimsy to the lower area of your scene.
Step 17. Add the floating wooden steps ascending from the interior rim.
In the final placement phase of Dreamy Room Level 128, you will add a series of floating wooden steps that ascend from the lower right interior rim up to the counter height. To begin, select the first step plank and snap its bottom edge onto the interior rim, angling the plank upward. Next, pick each subsequent wooden plank and place it slightly above the previous one, creating an evenly spaced staircase of floating steps in Dreamy Room Level 128. Ensure the steps maintain consistent horizontal alignment in Dreamy Room Level 128, with uniform gaps that allow light to pass through beneath. Once all planks are in place in Dreamy Room Level 128, the staircase effect will complete the dimensional illusion for this level.
Notes and Precautions
-
The primary challenge in Dreamy Room Level 128 is precision placement, where slight misplacement can cause items to overlap or snap out of place.
-
Certain items in Dreamy Room Level 128, like the cherry and crystal blocks, must rest in indentations. If you try to place them freely, the game may reject the placement.
-
When positioning floating steps, avoid accidental selection of adjacent items. In Dreamy Room Level 128, tap directly on the plank to ensure you’re adjusting the correct element.
-
If the teddy bear or snow globe seems to flicker, reselect it in Dreamy Room Level 128 and nudge it gently back into position.
-
Luminosity and shadow settings in Dreamy Room Level 128 can create optical illusions. Zoom in slightly if you need a closer look.
-
If you accidentally place an object incorrectly in Dreamy Room Level 128, use the undo button to retry immediately.
-
Ensuring that your backdrop rim staining is uniform in Dreamy Room Level 128 will prevent color bleed between the whipped cream and pastel gradient.
Tips and Tricks from top player
A strategic grid-snapping approach can save you considerable time and frustration in Dreamy Room Level 128. Activating snapping helps you align structural elements such as the whipped cream drape, glass shelves, and floating steps with precision. In my personal runs through Dreamy Room Level 128, I found that toggling snapping on before placing bulky objects eliminated half the trial-and-error, especially when aligning the edges of shelves and the dome rim.
To achieve a polished look in Dreamy Room Level 128, use the zoom and pan controls frequently. Zooming in on detailed areas like the sprinkle rods or crystal blocks allows micro-adjustments to object rotations and positioning. Panning across the scene ensures you maintain context and never lose sight of your overall layout, which is crucial when working on multi-stage sections in Dreamy Room Level 128.
When you’re ready to finalize groupings of similar objects in Dreamy Room Level 128—such as the row of pastries or paired ottomans—use the duplicate and reposition method. Duplicate an example item, place copies evenly, and then adjust colors or rotations individually. Finally, lock completed sections in Dreamy Room Level 128 to prevent accidental drifts as you add final touches like the snow globe and Christmas tree. These strategies can help ensure your success in Dreamy Room Level 128 consistently.
Final Scene Description
At the conclusion of Dreamy Room Level 128, players see a pastel-chocolate dome interior transformed into a miniature wonderland. Soft whipped cream drapes dotted with green, red, and purple sprinkle rods and yellow star sprinkles frame the opening. A scarlet cherry crowns the apex, drawing the eye skyward. Inside, two pastel picture frames hang above slender decorative skis. A golden reindeer figurine stands on the L-shaped counter alongside wrapped gifts. Wall shelves display colorful loaves and buns, while the countertop holds rows of frosted pastries arranged precisely. Transparent crystal blocks rest at the counter’s base, catching light. A pink teddy bear and a glittery snow globe share two cushioned ottomans on a round red rug. A candy-cane decorated tree glows beside a staircase of floating wooden steps, completing the cozy scene in Dreamy Room Level 128. Every detail feels meticulously placed, reflecting the core challenge of Dreamy Room Level 128.