Dreamy Room Level 312
Dreamy Room Level 312 guide - Dreamy Room 312 Walkthrough & Solution.

Important Notice Regarding Level Numbering
Due to frequent changes in Dreamy Room's level numbering and differences between platforms (Android/iOS) – for example, level 312 on Android might not be the same as level 312 on iOS – the text guide below may not always match the images and video above. Please prioritize the image and video guides. If you find that the guide content doesn't match your current level, please visit the All Level Walkthroughs page to find the correct guide based on level images. Thank you for your understanding.
Dreamy Room Level 312 Walkthroughs & Guide
Step 1. Place the back-wall fixtures and mezzanine elements in the room.
Begin by defining the room’s backbone — the back wall, the left wall, and the mezzanine railing. In Dreamy Room Level 312 you want the glass-railed mezzanine placed flush against the back corner so the mezzanine’s front edge aligns with the central tiled floor grid. Place a glowing “CAT STORE” sign centered above the left side of that mezzanine; this sign anchors the whole scene in Dreamy Room Level 312 and cues the player where to balance upper- and lower-level objects. On the mezzanine, arrange boxed air-conditioner units and two tall standing air conditioners in a tidy row behind the glass railing — each box should sit one tile apart so the boxed labels are readable. Add framed art on the back and left walls above the mezzanine to fill vertical space. Dreamy Room Level 312’s first challenge is ensuring these upper items don’t visually crowd the mezzanine: keep spacing even, keep the glass railing transparent, and make sure the sign comfortably overhangs the left mezzanine without touching the roof edge.
Step 2. Place floor displays, checkout counter, and central appliances.
Now populate the main showroom floor. In Dreamy Room Level 312, place four central display tables in a square near the middle of the tiled area; these tables will hold phones, small speakers, and boxed accessories. Position the main checkout counter with twin monitors center-front so it faces the entrance; in Dreamy Room Level 312 the checkout is the room’s focal landing point and should align with two floor tiles from the front edge. To the left of the checkout, form a row of washing machines and pastel refrigerators against the left wall, stacked where the wall meets the floor. Place an A-frame sale board and a small mascot cat figure on the front platform near the entrance; these attract attention in Dreamy Room Level 312 and help guide foot traffic visually. The primary placement difficulty here — and a key gameplay challenge in Dreamy Room Level 312 — is keeping circulation clear: leave two-tile-wide aisles around the displays so the cat mascot and customers have visible walking paths and the store doesn’t look cluttered.
Step 3. Place the right-side platform, fans, stairs, and wall art.
Next, work on the right side and vertical circulation. In Dreamy Room Level 312 place a stepped stair unit at the rear-right corner leading up to the mezzanine; align stairs so each step occupies a tile and the top meets the mezzanine entrance. Along the right-side platform put a boxed fan display and four pedestal fans on a small riser with a “BIG SALE” sign; space each fan so their bases align to the tile grid and the sign sits to the front-right of them. Add posters, product boxes, and a framed poster of a cat on the right wall above the fans to create visual layering — Dreamy Room Level 312 rewards players for stacking visual interest without blocking key silhouettes. Make sure the stair edge and the fan platform have at least one tile separation from the central floor displays so that sightlines remain clear. The main conundrum in Dreamy Room Level 312 at this stage is exact alignment: fans must face slightly outward, stairs must not overlap the mezzanine glass supports, and wall art must be high enough to remain visible from the floor.
Step 4. Place exterior planters, entrance props, and finishing touches.
Finish the scene by dressing the entrance area and peripheral props. In Dreamy Room Level 312 place three rectangular planters filled with shrubs along the front-left edge of the exterior base platform; they should sit flush to the platform rim and be evenly spaced. Add a curved outer baseboard trim and the rounded platform corner so the whole diorama reads like a polished display model — Dreamy Room Level 312’s base needs a clean edge to frame the interior. Position small podiums with demo boxes, phone display stands, and promotional cubes near the center-left aisle; these should not block the main aisle to the checkout. Place a cheerful standing cat mascot near the front-center beside the A-frame sign. Lastly, walk the perimeter to add small boxes on shelves, price tags on machines, and glass bolts for the railing. The finishing task in Dreamy Room Level 312 is subtle: finalize reflections on glass, ensure shadows match the light source, and verify each sticker and price tag is readable at the intended zoom so the scene feels lived-in and sale-ready.
Notes and Precautions
When building Dreamy Room Level 312, be cautious about overlapping hitboxes and occlusion. The game’s engine considers placement accuracy, and incorrectly snapping an object by a half-tile can cause it to clip through the glass railing or staircase. Always check upper-level placements from a floor-level camera angle and an overhead camera angle in Dreamy Room Level 312 to catch collisions early. Avoid placing tall objects directly in front of signage or portrait frames — these visual elements are part of puzzles in Dreamy Room Level 312 where the correct reveal requires clear sightlines. Keep walkways at least two tiles wide so the in-game customers and the mascot can animate without pathfinding errors. Back up your layout before heavy edits: Dreamy Room Level 312’s undo stack is limited in some modes. Finally, be mindful of color balance; pastel clusters are intentional in this level, and over-saturating one zone will make the overall composition look off.
Tips and Tricks from top player
Top players of Dreamy Room Level 312 recommend a structured placement order: start with fixed architecture (walls, mezzanine, stairs), then anchor with large appliances (fridges, washers), then add medium fixtures (mezzanine boxes, fan risers), and finish with small props (price tags, demo phones). Use grid snapping in single-tile increments to maintain symmetry — Dreamy Room Level 312 rewards tidy grids. Mirror-place planters and countertop displays to create pleasing sightlines; symmetry reduces player guesswork about correct placements in Dreamy Room Level 312’s puzzles. For speed, create a “prop palette” grouping of frequently used items and duplicate them for quick drops — this accelerates completion without sacrificing precision. If you’re stuck, toggle the collision overlay (if available) to reveal hidden overlaps that block placement. Finally, save incremental layout versions as checkpoints: Dreamy Room Level 312 often requires small adjustments late in the process, and rollback is faster than rebuilding.
Final scene
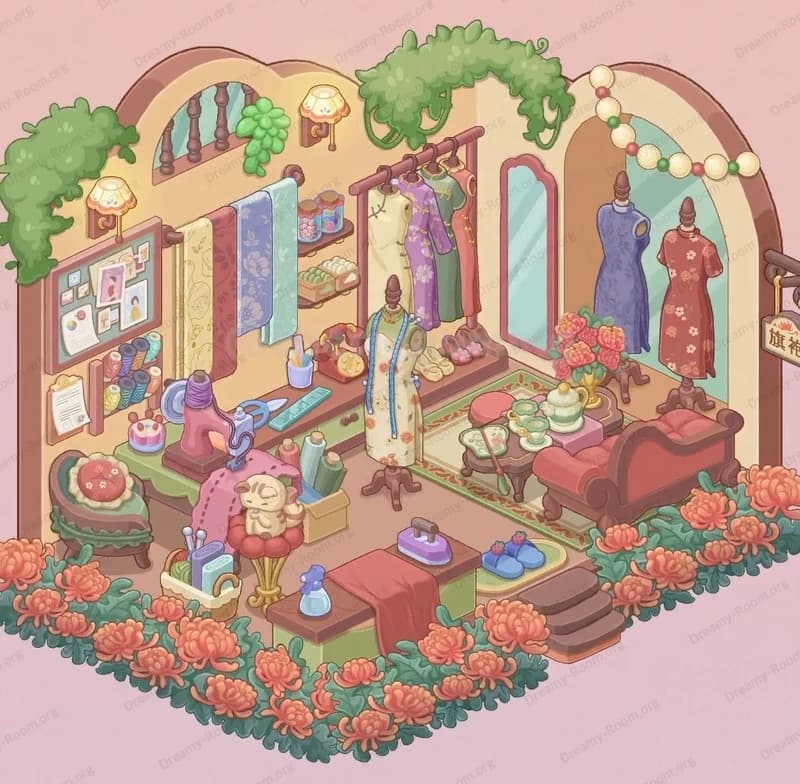
The completed Dreamy Room Level 312 presents a cozy, pastel-toned electronics boutique arranged in precise isometric detail. A glowing CAT STORE sign tops the left mezzanine, where boxed air conditioners and tall standing units sit under framed art. The left wall features pastel refrigerators stacked beside washing machines along the back. A glass-railed upper balcony overlooks the tiled showroom floor with four central display tables showcasing phones, speakers, and appliances. The checkout counter with twin monitors sits center-front near an A-frame sale board and a smiling mascot cat on the platform. Three planters of shrubs line the front edge; a right-side platform holds a row of pedestal fans with a “BIG SALE” sign. Stairs at the rear-right connect levels. Posters and product boxes line the walls and shelves. Every object’s precise placement matters; the finished room feels balanced, playful, and warmly inviting — a signature of Dreamy Room Level 312.


