Dreamy Room Level 236
Dreamy Room Level 236 guide - Dreamy Room 236 Walkthrough & Solution.

Important Notice Regarding Level Numbering
Due to frequent changes in Dreamy Room's level numbering and differences between platforms (Android/iOS) – for example, level 236 on Android might not be the same as level 236 on iOS – the text guide below may not always match the images and video above. Please prioritize the image and video guides. If you find that the guide content doesn't match your current level, please visit the All Level Walkthroughs page to find the correct guide based on level images. Thank you for your understanding.
Dreamy Room Level 236 Walkthroughs & Guide
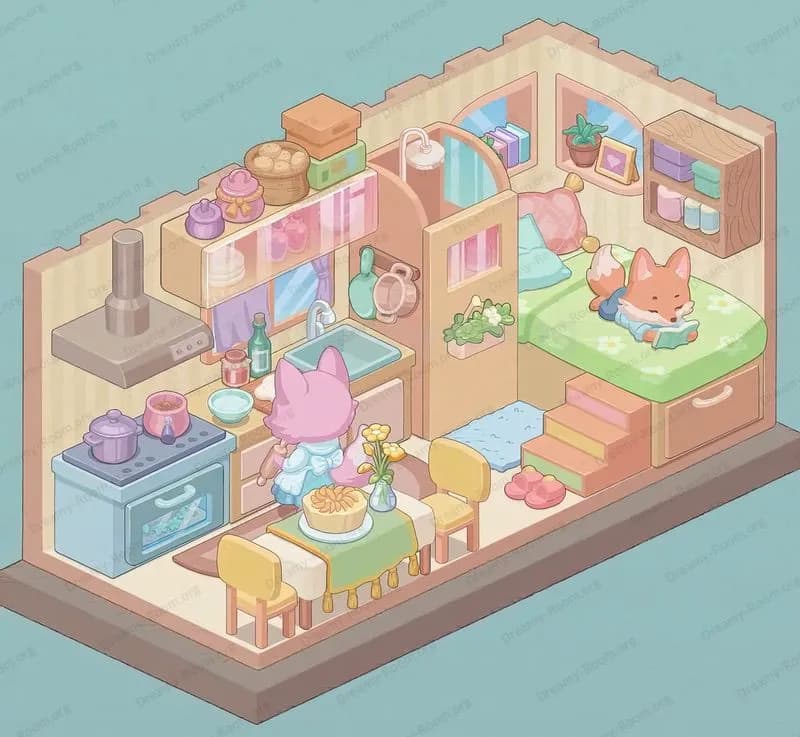
Dreamy Room is a tranquil game about unpacking memories and situating objects in serene interiors . In Dreamy Room Level 236, you face an empty pastel-trimmed case interior and your main challenge is determining the correct placement for each item to reveal a storybook loft. This walkthrough will guide you step by step.
Step 1. Place the Ladder and Door Fixtures in Dreamy Room Level 236
At the beginning of Dreamy Room Level 236, you will face an empty isometric chamber with blue walls and a geometric patterned floor. The primary structural elements you need to place are the ladder in the lower-left corner, the door panel, and the pair of skylight windows on the slanted roof. To accomplish Step 1 of your Dreamy Room Level 236 transformation, first select the tall wooden ladder from the objects palette and snap it against the inner left wall so that it aligns precisely with the mezzanine support. Next, choose the single-panel door graphic and position it in the designated entrance notch at the base of the left wall in Dreamy Room Level 236. Finally, pick up each of the two rectangular skylight windows and affix them onto the sloping ceiling above the right side. Ensuring proper alignment is crucial in Dreamy Room Level 236, as the visuals depend on seamless integration between each element. Taking extra time to rotate the ladder and door until they sit flush will guarantee that your Dreamy Room Level 236 progression remains smooth and your base structure is ready for the decorative layers to follow.
Step 2. Position the Climbing Vines and Flower Beds in Dreamy Room Level 236
In Dreamy Room Level 236, the natural greenery accents bring warmth and life to the interior space. To complete Step 2, locate the trailing vine asset and carefully attach it along the top-left inner wall, allowing the leaves to drape down past the mezzanine floor. Ensure that the vine overlaps the lattice window instalment slightly for an authentic entwined appearance in Dreamy Room Level 236. Next, find the climbing ivy graphic and place it on the right wall, aligning the tendrils to curl upward towards the ceiling in Dreamy Room Level 236. After securing these indoor vines, switch to the outdoor floral section and pick the low rose bush cluster. Place this rose bed just outside the base of the staircase at the lower-left corner of Dreamy Room Level 236, ensuring the petals peek into the scene. The addition of these natural elements in Dreamy Room Level 236 helps frame the room and softens the industrial metal and wooden structures beneath, so take extra care to avoid clipping any leaves through the wall.
Step 3. Assemble the Mezzanine Platform and Railing for Dreamy Room Level 236
The mezzanine level is a defining feature of Dreamy Room Level 236 that doubles the room’s functional space. For Step 3, start by selecting the sturdy dark wood support beams: place one vertical beam on the left side adjacent to the ladder and a matching beam on the right side near the inner wall in Dreamy Room Level 236. Confirm that these beams sit firmly on the floor grid to achieve perfect alignment. Next, choose the flat wooden panel for the mezzanine floor and snap it onto the horizontal ledge formed by the support beams in Dreamy Room Level 236, creating a seamless elevated surface above the kitchen and dining area. Finally, attach the decorative railing segments around the mezzanine floor's edge, ensuring the posts align with the beams and that the railing’s balusters are evenly spaced within Dreamy Room Level 236. Properly assembling the mezzanine is crucial for supporting the bedroom furniture in subsequent steps of Dreamy Room Level 236 and maintaining visual balance.
Step 4. Place the Bed Frame, Mattress, and Bedding in Dreamy Room Level 236
The sleeping area is the heart of your makeshift loft in Dreamy Room Level 236, and proper bedding placement is essential to evoke comfort and style. In Step 4 of Dreamy Room Level 236, first choose the dark wooden bed frame and position it in the top-right corner of the mezzanine level, aligning it evenly against the back wall. Next, select the soft purple mattress and place it inside the frame so that the edges line up flush in Dreamy Room Level 236. Once the frame and mattress are secure, pick the mustard-yellow bolster pillow, the patterned bolsters, and the matching side pillows. Arrange the cylindrical bolster at the foot of the bed, followed by the two square pillows against the headboard in Dreamy Room Level 236 for a layered look. Finally, drape the cozy purple quilt over the center of the bed, ensuring that it folds naturally in Dreamy Room Level 236. Achieving the correct orientation and symmetry in Dreamy Room Level 236 will make the bed area visually inviting and set the tone for your lofted sanctuary.
Step 5. Add the Nightstand, Desk, Chair, Books, and Cosmetics in Dreamy Room Level 236
Furnishing the mezzanine work corner in Dreamy Room Level 236 requires careful placement of multiple small accessories to complement the bedroom. To start Step 5 of Dreamy Room Level 236, select the compact two-drawer nightstand and slide it against the right inner wall, directly beside the head of the bed in Dreamy Room Level 236. Next, fetch the small wooden desk and chair set: place the desk near the far-left section of the mezzanine so it rests parallel to the lattice window in Dreamy Room Level 236, then situate the matching chair so that it faces inward toward the open book. After establishing your workspace in Dreamy Room Level 236, add the open storybook prop atop the desk, ensuring the spine aligns neatly with the desk's edge. Place the small amber glass bottle and the floral vase on either side of the book to create an intimate vignette within Dreamy Room Level 236. Confirm that each ornamental piece is correctly rotated and scaled for realism in Dreamy Room Level 236 before proceeding to the next step.
Step 6. Install the Lattice Window Panels, Picture Frames, and Wall Clock in Dreamy Room Level 236
Enhancing the vertical surfaces is essential in Dreamy Room Level 236 to prevent the walls from looking bare. In Step 6 of Dreamy Room Level 236, first select the set of three wooden lattice window panels and attach them evenly across the upper-left wall of the mezzanine, ensuring that the panels align precisely with the window openings in Dreamy Room Level 236. Next, choose the colorful picture frames—pink, blue, and lavender—and arrange them to the right of the lattice windows in Dreamy Room Level 236, spacing them at equidistant intervals to create a gallery wall. Don’t forget the small arched transom window above the lattice set; place it just beneath the ceiling slope in Dreamy Room Level 236 to complete the architectural detail. Finally, select the vintage wall clock asset and affix it on the right wall beside the nightstand in Dreamy Room Level 236, ensuring the clock’s pendulum hangs down without intersecting other objects. This layered wall arrangement in Dreamy Room Level 236 gives the mezzanine a lived-in, curated ambiance that ties the room together visually.
Step 7. Set Up the Kitchen Counter, Sink, Stove, and Microwave in Dreamy Room Level 236
The kitchenette on the ground floor of Dreamy Room Level 236 brings functionality and character to the lower area. For Step 7 of Dreamy Room Level 236, begin by selecting the rectangular sink unit and snap it into place against the left support beam, aligning the basin under the open mezzanine section in Dreamy Room Level 236. Next, fetch the two-burner stove asset and position it directly to the right of the sink in Dreamy Room Level 236, making sure the stove knobs face outward for proper orientation. To the immediate right of the stove, place the compact countertop microwave, ensuring it sits flush on the same counter surface in Dreamy Room Level 236. Confirm that all appliances are aligned on the same horizontal plane to avoid any visual offset errors in Dreamy Room Level 236. Taking time to calibrate the distances between the sink, stove, and microwave in Dreamy Room Level 236 will yield a cohesive kitchen vignette that feels both functional and charming.
Step 8. Arrange the Dining Table, Chairs, Cups, and Floral Centerpiece in Dreamy Room Level 236
The communal dining area is a highlight of your Dreamy Room Level 236 design that encourages cozy gatherings. For Step 8 in Dreamy Room Level 236, select the round wooden table and position it centrally on the lower floor beneath the mezzanine overhang in Dreamy Room Level 236, ensuring it sits on the patterned floor tile exactly at the midpoint. Next, grab the six matching wooden chairs and place them around the table in a hexagonal formation, verifying that each chair’s backrest is evenly spaced in Dreamy Room Level 236. Then, pick up the four cream-colored coffee cups and distribute them symmetrically on the table’s surface in Dreamy Room Level 236 to indicate a group ready for tea. Finally, install the purple floral vase with fresh blooms at the center of the table in Dreamy Room Level 236, adjusting the angle so the flowers fan out naturally. Properly centering the table and accessories in Dreamy Room Level 236 will create an inviting focal point for your miniature loft.
Step 9. Place the Bookshelf, Globe, Books, and Scrolls in Dreamy Room Level 236
Organizing storage elements is crucial for achieving narrative depth in Dreamy Room Level 236. In Step 9 of Dreamy Room Level 236, select the tall wooden bookshelf and anchor it against the right interior wall on the ground floor, directly below the mezzanine railing in Dreamy Room Level 236. Once the shelf is firmly placed, add the world globe prop to the top-left cubby of the bookshelf in Dreamy Room Level 236, tilting it slightly for a playful angle. Next, choose the assorted books—spread across the middle and top shelves—and place them standing upright and stacked in Dreamy Room Level 236 to mimic genuine usage. Finally, situate the rolled parchment scrolls in the bottom compartments and the open ancient text nestled on a crate next to the shelf in Dreamy Room Level 236, ensuring the scroll ends protrude realistically. This meticulous arrangement in Dreamy Room Level 236 establishes both utility and story, inviting players to imagine the occupant’s adventures.
Step 10. Position the Couch, Decorative Crate, and Accessories in Dreamy Room Level 236
The final furnishing touches in Dreamy Room Level 236 transform the space from functional to cozy and eclectic. For Step 10 in Dreamy Room Level 236, pick the modular two-toned couch piece and attach it to the lower-right corner of the ground floor, aligning it perpendicular to the dining table in Dreamy Room Level 236. Next, grab the decorative crate filled with rolled maps and place it adjacent to the couch armrest in Dreamy Room Level 236, ensuring the crate’s metallic studs face outward. On top of that crate, lay the weathered hardcover book at a slight angle to suggest recent reading in Dreamy Room Level 236. Confirm that the couch cushions do not clip into the rug edge and that the crate sits flush with the floor tiles in Dreamy Room Level 236. This last step of Dreamy Room Level 236 completes the environment, offering a lived-in nook that beckons relaxation.
Notes and Precautions
When embarking on Dreamy Room Level 236, it’s essential to understand that the game’s core challenge revolves around precise placement. Unlike timed puzzle games, Dreamy Room Level 236 emphasizes accuracy. Players must avoid accidental misalignment, especially when rotating or scaling each asset to fit seamlessly. In Dreamy Room Level 236, ensure that you always snap objects to the grid or use the built-in guide lines to verify that each piece sits flush with adjacent elements. The ladder, mezzanine rails, and couch cushions are particularly sensitive to slight misplacement in Dreamy Room Level 236 because even a one-pixel offset can create visible clipping. Additionally, Dreamy Room Level 236 requires attention to layering order; placing a picture frame behind the lattice window by mistake will obscure it. To prevent this, double-check the object hierarchy panel before confirming positions in Dreamy Room Level 236. Remember that Dreamy Room Level 236 offers an “undo” feature, but relying on it too often can break immersion. Instead, take a moment to rotate the object slowly and hover it near the target location to preview the fit. Finally, be mindful of overlapping interactive zones in Dreamy Room Level 236: certain objects like cups and scrolls may inadvertently lock together if they occupy the same tile, requiring a manual nudge to separate them.
Tips and Tricks from Top Player
Veteran players of Dreamy Room Level 236 have discovered several shortcuts that streamline the decoration process. The first tip is to enable “snap-to-center” mode in Dreamy Room Level 236 when placing circular objects like the round table and globe; this feature locks the element into the exact center of the grid tile, reducing alignment errors in Dreamy Room Level 236. Another pro strategy is to use the “ghost preview” toggle in Dreamy Room Level 236 to visualize how two objects might overlap before committing to placement. This is especially helpful for arranging the floral vines in Dreamy Room Level 236, as it prevents clipping with the lattice windows. Additionally, top players often group the bed linens and pillows into a composite asset in Dreamy Room Level 236, which allows for single-click insertion instead of multiple manual steps in Dreamy Room Level 236. If you anticipate swapping out decorative props later, consider using the favorites panel in Dreamy Room Level 236 to bookmark frequently used items. Finally, experienced decorators recommend exporting a quick screenshot of your current layout in Dreamy Room Level 236 before making large changes; this way, you can reference the image to restore any accidental shifts back to their optimal positions in Dreamy Room Level 236. With these techniques, your Dreamy Room Level 236 creation will feel both effortless and refined.
Final Scene Description
The completed Dreamy Room Level 236 scene shows a cozy two-level loft inside a softly curved rose-trimmed case with patterned tile floor. On the lower level, beneath the mezzanine support, a compact kitchen features a sink, two-burner stove, and microwave. A round wooden table stands central among six chairs, each set with cream-colored cups and centering a purple vase. Adjacent, a teal and gray couch faces the table, beside a decorative crate holding rolled maps and a weathered book. To the right, a tall wooden bookshelf holds upright books, stacked volumes, scrolls, and a tilted globe. On the mezzanine, reached by a wooden ladder at left, a dark bed with plush purple bedding, bolsters, and pillows rests against the back wall. Nearby, a desk displays an open book, a glass bottle, and floral vase beneath twin-window skylights, flanked by lattice panels, frames, and trailing vines for immersive decorative depth throughout.