Dreamy Room Level 523
Dreamy Room Level 523 guide - Dreamy Room 523 Walkthrough & Solution.

Important Notice Regarding Level Numbering
Due to frequent changes in Dreamy Room's level numbering and differences between platforms (Android/iOS) – for example, level 523 on Android might not be the same as level 523 on iOS – the text guide below may not always match the images and video above. Please prioritize the image and video guides. If you find that the guide content doesn't match your current level, please visit the All Level Walkthroughs page to find the correct guide based on level images. Thank you for your understanding.
Dreamy Room Level 523 Walkthroughs & Guide
Walkthrough for Dreamy Room Level 523
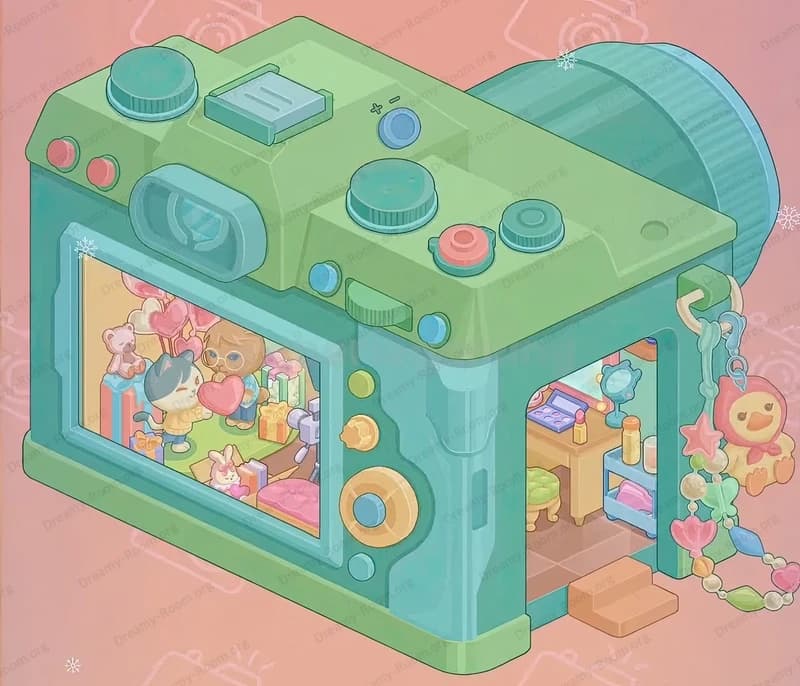
In Dreamy Room Level 523, you turn an empty floating platform into a cozy two-floor fashion and tea shop. Every chair, plant, cup, and character has only one correct spot, so the challenge in Dreamy Room Level 523 is to recognize the structure of the house and build it layer by layer. This level keeps the same slow, relaxing spirit as the rest of Dreamy Room, where you calmly place meaningful objects to create a lived-in space.
Follow the steps below carefully and you’ll match the finished image perfectly.
Step 1. Place the terrace base, front railing, stairs, and flowerbeds
Start the layout of Dreamy Room Level 523 by finishing the ground terrace. Along the front edge of the platform, place the curved cream-colored railing with heart-shaped gaps so it follows the contour of the grass. Center the little two-step wooden staircase at the front, right where the railing opens inward. In front of the terrace, drop the long planter full of yellow-and-white flowers that runs all the way along the bottom. Make sure the planter hugs the edge of the grass and aligns with the stairs. This establishes the outdoor boundary of Dreamy Room Level 523 and frames everything you’ll add inside later, so don’t leave gaps between the railing pieces or the flowers will look misaligned.
Step 2. Place the left lamp post, hanging plants, and window area
Now decorate the left wall of Dreamy Room Level 523. On the far left edge, just outside the railing, place the tall dark metal lamp post with the curly top. Hang the small basket with green leafy plants from it so it dangles over the grass. Just behind the railing, add the round bush of yellow flowers near the base of the lamp. Against the interior left wall, position the large window so it sits just above floor level. Add the lime-green curtains with frilly white edges and orange ribbons on the curtain rod that matches the top of the window. Above the window, hang the two small framed pictures: the rectangular one on the left and the square one on the right. These placements create the cozy left corner of Dreamy Room Level 523 and leave enough space to fit the furniture below.
Step 3. Place the gramophone cabinet and entrance corner details
Under the window of Dreamy Room Level 523, place the tall white-and-yellow cabinet so it stands slightly to the left of the center of the left wall. On top of this cabinet, set the golden gramophone with its flower-shaped horn facing toward the front. To the right of the gramophone, drop the small blue book or notebook so it leans against the cabinet top. Check that the cabinet does not block the railing opening and that the gramophone horn is clearly visible from the front. At the base of the cabinet, the lower drawer should align with the floor tiles. This cluster becomes the “music and welcome” zone of Dreamy Room Level 523, so keeping the spacing right ensures the later ladder and worktable can fit beside it without overlapping.
Step 4. Place the central worktable, chair, thread spools, and tailor character
Next, focus on the center of Dreamy Room Level 523. In the middle of the floor, place the long white worktable horizontally so its short side faces the front railing. Slide a pale wooden chair in front of the table, slightly left of center. On the right side of the table top, put the big pair of blue scissors, and near them place the rectangular yellow pincushion or fabric block. On the left side of the table, drop the two large thread spools (green and yellow) so they stand upright. In front of them, you’ll place a long blue ruler lying flat. Finally, behind the table, add the brown bear tailor character on a small stool, holding the teal cloth that drapes over the table edge. The bear must sit between the table and the back shelves, perfectly centered. This is the heart of Dreamy Room Level 523’s tailoring workshop, so ensure the table remains clear enough to see all tools.
Step 5. Place the lower storage shelves, accessory wall, and right-side lounge
Now fill the back and right walls of Dreamy Room Level 523. Behind the bear, place the stepped white shelving unit with folded green and yellow clothes on the middle and upper levels and colored storage boxes on the lower levels. Push it flush against the back wall. To the right of this unit, along the right wall, place the long yellow counter with drawers. On top of this counter, arrange the hats and accessories: the green bunny-eared hood, a brown hat, and the pink heart handbag all sitting side by side. Above them, mount the shelf with sunglasses: blue, purple, and pink heart-shaped glasses lined neatly across. Further right, mount the vertical wall rack with tall colorful bottles or rolled-up fabrics in a neat row. Below this rack, slightly forward, position the brown suitcase-like storage box with a handle. At the front-right corner of Dreamy Room Level 523, place the beige ottoman and, in front of it, the small round table with a pink teapot and matching teacup. Finally, recline the sleepy character in the green blanket and pink wide-brim hat on the curved seat near the glass wall. Her feet should face left, her head toward the back.
Step 6. Place the curved glass wall, framed picture, and balcony railing
With the right-side lounge in place, finish the structure of Dreamy Room Level 523. On the right edge of the platform, place the tall arched glass wall with blue-tinted panes and brown frame. The curve should follow the contour of the terrace railing and rise up both floors. Just above the accessory wall, hang the small round framed picture with a plant inside; it sits between the vertical bottle rack and the glass wall. Along the front of the upper floor, line up the cream-colored balcony railing that matches the design of the bottom railing. Make sure the posts line up directly above the lower ones, creating a tidy double-deck look that is key to the visual harmony of Dreamy Room Level 523. This also guarantees enough walkway space behind the balcony for the tea table and characters you’ll add next.
Step 7. Place the ladder, upper shelving, clothing, and mezzanine floor
Now connect the two floors of Dreamy Room Level 523. On the left side of the interior, between the gramophone cabinet and the back shelves, place the vertical wooden ladder made of thick planks. Each plank should line up evenly, forming a smooth climb. Above the lower shelves, place the white mezzanine floor platform so it extends from the left wall to the right wall, stopping just before the glass. Under this floor, add the white shelf stacked with folded clothes and boxes, aligning it right beneath the balcony. On the edges of the mezzanine floor, attach the small coat hooks where green and yellow garments hang. This step is about careful vertical alignment: the ladder must touch both the lower floor and the mezzanine, and the hooks should line up just under the balcony rail. Done right, Dreamy Room Level 523 now clearly looks like a busy little tailor shop with an upper floor waiting for customers.
Step 8. Place the tea table, upper characters, roof, and decorative handle
Finish the top level and roof to complete Dreamy Room Level 523. On the mezzanine near the front railing, place the long cushioned bench facing the right wall. To its right, add the small round white table with a pink teapot and cup. Seat the yellow-haired character in blue clothes on the right side of the bench, holding a cup. On the left, stand the pink curly-haired sheep character facing them happily. Behind them on the wall, hang the wide framed picture with a pink background. To the far right of this upper wall, mount the tall mirror or window with blue glass, then add the small staggered shelves above it holding jars and a plant. Now add the green roof plank across the top, aligned with the back wall. On its right side, attach the sloped green-tiled roof section that leans over the glass. On top of the main roof, place the giant brown suitcase-style handle in the center, and near its front edge, drop the wooden clasp piece. Finally, drape the small green vine over the roof’s left front corner. These finishing touches give Dreamy Room Level 523 its distinctive “portable shop” look.
Notes and Precautions
When playing Dreamy Room Level 523, keep an eye on vertical stacking. Many objects overlap visually, so placing something one tile too far forward or backward can hide an important detail, like the thread spools or sunglasses. Always build from the bottom up: terrace and railings first, then furniture, then shelves, then characters, then roof. If an item won’t snap into place, it usually means another piece—often a shelf, ladder, or railing segment—is missing underneath it. In Dreamy Room Level 523, the ladder alignment is especially critical; if it’s off, the mezzanine floor and balcony won’t accept their positions. Also be careful not to swap similar decorations: the two teapot sets belong on different tables, and the flowerbeds only fit along the front edge, not on the side. Rotate the camera mentally based on the isometric view to confirm each object naturally connects with its neighbors before locking it in.
Tips and Tricks from top player
Top players approach Dreamy Room Level 523 by grouping objects by function rather than color. First, they place all structural pieces—railings, shelves, mezzanine, glass wall, and roofs—so the overall silhouette matches the final scene. Then they handle “stations”: music corner, worktable, accessories wall, lounge, and tea balcony. For each station, they drag every related object into the correct area before fine-tuning tile positions, which speeds up completion. Another strong tactic in Dreamy Room Level 523 is to treat characters like the final check. If a character doesn’t sit or stand comfortably (for example, the tailor bear overlapping the table or the sleeping guest drifting off the couch), it means nearby furniture is slightly off. Finally, because many items visually echo each other—teapots, hats, plants—use their context as a clue: drinks always sit near characters, hats stay on accessory shelves, and big plants anchor corners or gaps in the railing.
Final Scene Overview of Dreamy Room Level 523
When you finish Dreamy Room Level 523, the once-empty island becomes a lively little boutique. The front terrace is framed with bright flowers and delicate cream railings, inviting visitors up the wooden steps. On the left, the lamp post, hanging planter, and gramophone under soft curtains create a welcoming entrance. The center is busy with the bear tailor calmly working at a cloth-covered table surrounded by spools and tools, while shelves of neatly folded clothes rise behind him. To the right, hats, sunglasses, and colorful bottles line the walls, leading to a sunlit lounge corner where a guest naps beside a warm cup of tea, protected by the curved glass wall. Above, a cozy balcony hosts a friendly tea party between two characters, lit by the large window and wall shelves. Capping it all, the green roof and giant handle make the whole house feel like a whimsical suitcase shop ready to travel anywhere.