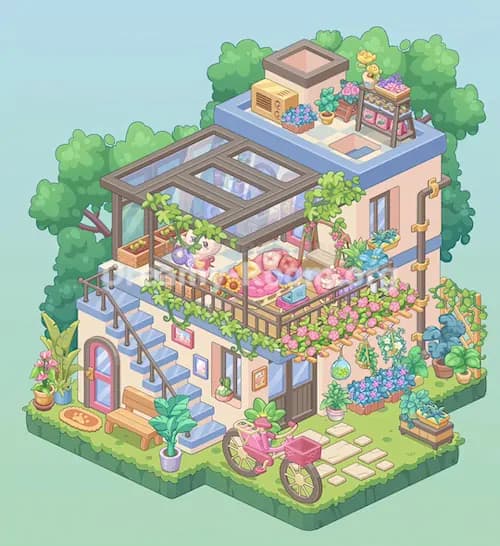
Dreamy Room Level 636
Dreamy Room Level 636 guide - Dreamy Room 636 Walkthrough & Solution.
Important Notice Regarding Level Numbering
Due to frequent changes in Dreamy Room's level numbering and differences between platforms (Android/iOS) – for example, level 636 on Android might not be the same as level 636 on iOS – the text guide below may not always match the images and video above. Please prioritize the image and video guides. If you find that the guide content doesn't match your current level, please visit the All Level Walkthroughs page to find the correct guide based on level images. Thank you for your understanding.
Dreamy Room Level 636 Walkthroughs & Guide
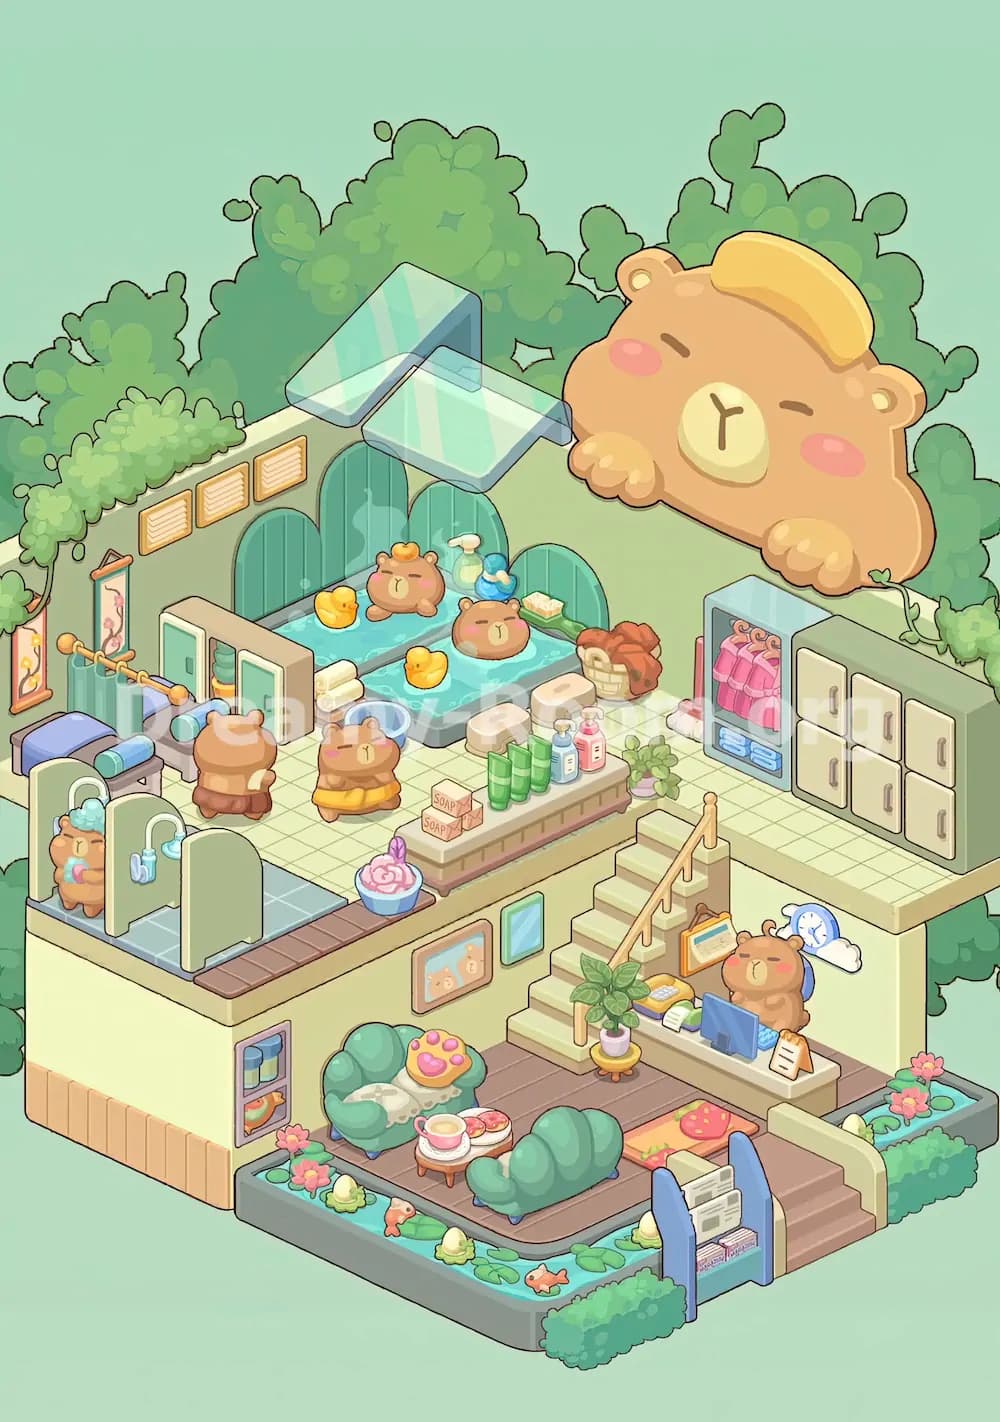
Dreamy Room Level 636 turns a plain, empty shell into a charming bear-themed bathhouse and lounge. The real puzzle in Dreamy Room Level 636 is not the number of items, but the exact place where each object belongs. If one piece does not snap into position, it usually means another nearby item in Dreamy Room Level 636 must be placed first. The safest method is to build Dreamy Room Level 636 from the biggest structural decorations down to the tiniest accessories. Follow the order below to recreate the completed room accurately.
Step 1. Place the signature outdoor decorations and upper-wall features in Dreamy Room Level 636
Begin Dreamy Room Level 636 by establishing the large visual pieces that define the room’s identity. Along the back edge of the upper floor, place the dense green bushes so they wrap behind the left wall, across the rear corner, and behind the right wall. After that, install the giant sleeping bear decoration on the upper-right rear wall, with its paws resting over the wall edge and its yellow cap or towel sitting on top of its head. This is the biggest landmark in Dreamy Room Level 636, so getting it right helps the smaller items line up naturally. Next, fit the two translucent blue glass skylight panels above the bath area near the upper center-left, slightly overlapping each other at an angle. On the upper-left back wall, add the three cream louvered panels in a neat horizontal row. Finish this early structure work by placing the trailing vine near the far-right upper edge. Once these pieces are in place, Dreamy Room Level 636 starts looking like a cozy themed spa instead of an empty room.
Step 2. Place the soaking pools and bath-side essentials in Dreamy Room Level 636
Now focus on the main bathing zone in Dreamy Room Level 636. Put the two rectangular blue soaking pools side by side against the back wall, centered under the skylights and in front of the teal arched wall panels. The left pool sits slightly farther left, while the right pool continues the line toward the bear-head wall decoration. Add the rolled white towels at the front-left edge between the pools, then place the blue wash basin on the floor in front of them. Set the two cream stools just in front of the tubs, one closer to the center and one slightly to the right. On the right side of the tubs, place the small bath items: the sponge tray on the tub edge, the spray and pump bottles behind it, and the woven basket filled with orange towels on the floor beside the right pool. Finally, add the rubber ducks so they float naturally across the water, with one toward the back-left pool and the others toward the front edges. In Dreamy Room Level 636, this bath area is the heart of the room, so every bath accessory must be aligned carefully.
Step 3. Build the left washing and treatment corner in Dreamy Room Level 636
The left side of Dreamy Room Level 636 is crowded with useful bathhouse furniture, so place it in layers. Start with the two blue treatment beds along the left wall, positioned one behind the other with teal bolster pillows at the head. Between and behind them, place the central divider cabinet with pale green doors and stacked folded towels visible in the shelves. After that, mount the gold towel rod on the left wall and arrange the blue towels across it. Add the two hanging framed floral scrolls nearby, one closer to the far-left wall edge and the other closer to the towel rod. Move to the front-left corner and install the two shower stalls with pale green partitions over the blue-tiled floor. One stall sits at the very front-left corner and the other just to its right. This entire left zone is important in Dreamy Room Level 636 because the beds, shower stalls, cabinet, rod, and wall art all lock together tightly. If spacing looks wrong, adjust from the back wall first and work forward again.
Step 4. Add the center counter, changing storage, and cleaning items in Dreamy Room Level 636
Next, fill the middle and right side of the upper floor in Dreamy Room Level 636. Place the long beige display counter across the front edge of the upper platform, roughly centered between the bath zone and the stairs. On top of it, line up the green tubes first, then the blue bottle and pink bottle, and finally the small potted plant at the right end. Set the two soap boxes near the left side of the counter. In front of the counter, place the blue bowl holding the pink flower-shaped bath foam or bath petals. Then move to the right wall and place the open wardrobe cabinet with pink robes hanging inside and folded blue towels stored below. Just behind or beside it, set the pink-handled cleaning tool and white mop head. To the right of the wardrobe, attach the large six-door storage cabinet against the upper-right wall. Dreamy Room Level 636 expects this whole right side to feel like a changing and supply station, so keep the wardrobe, toiletries, and cabinet in a clean straight layout.
Step 5. Place the stairs, front desk, and reception details in Dreamy Room Level 636
Once the spa floor is complete, connect it to the lower area in Dreamy Room Level 636. Install the staircase descending from the upper floor near the right-center edge of the room. The stairs should angle down toward the lower lounge, with the handrail on the outer side. Beneath the stairs and slightly to the right, place the long reception desk. Then add the desk accessories in order: the yellow tray or telephone-like item on the left side, the open book beside it, the blue computer monitor in front, and the small standing clipboard sign near the front-right corner. Hang the framed certificate or notice from the stair rail just above the desk. On the wall behind the receptionist, place the blue clock with white cloud-like wings. At the foot of the stairs, set the leafy green potted plant on the little round yellow stand. Dreamy Room Level 636 uses this reception area to divide the upper bath zone from the lower relaxation zone, so proper placement here makes the whole layout read correctly.
Step 6. Furnish the lower lounge and wall decorations in Dreamy Room Level 636
Now decorate the calm resting area on the lower platform of Dreamy Room Level 636. Place the two rounded green armchairs facing each other across the wooden floor, with the left chair closer to the wall niche and the right chair closer to the steps. Drape the soft white cloth over the left chair and place the pink paw-shaped cushion on its seat. Between the chairs, set the small round wooden tea table with the large cup and saucer on top, then add the plate of pink pastries beside it. In the center of the floor between the lounge and the reception desk, lay down the warm-colored mushroom rug. On the wall above the chairs, hang the rectangular picture showing two little bear faces, and place the narrow blue mirror or framed panel to its right. On the outer left wall, fill the recessed shelf with the two jars on the upper level and the orange fish-shaped ornament on the lower shelf. Dreamy Room Level 636 becomes much cozier once this lounge area is balanced correctly.
Step 7. Decorate the exterior pond border, steps, and entrance in Dreamy Room Level 636
With the interior nearly complete, finish the lower exterior edge of Dreamy Room Level 636. Build the shallow water border that wraps around the front and both lower sides of the room. Inside this channel, place the lily pads first, then the pink flowers, the small orange fish, and the pale stone-like ornaments so the pond feels full but not crowded. Add the hedge-like green bushes along the front outer edge, especially around the center and right side of the entrance. Next, place the lower-right staircase leading up from the front path to the reception platform. At the center-front edge, install the blue newspaper or magazine stand and fill it with folded papers and magazines. This front element acts almost like the entrance feature of Dreamy Room Level 636, so keep it centered between the pond borders. If the water garden looks uneven, mirror the decorative balance from left to right instead of stacking too many flowers on one side.
Step 8. Place the bears and final character details in Dreamy Room Level 636
The last step in Dreamy Room Level 636 is to bring the bathhouse to life with the bear characters and their tiny scene-setting touches. Put one bear in the left soaking pool and another in the right soaking pool, making sure they sit low in the water while the ducks float nearby. Place the showering bear inside the left-front shower stall, with the foam and showerhead positioned above. Add the standing bear near the center-left cabinet with its back turned, as though preparing to change. Place the smaller seated bear wrapped in a yellow towel near the front-middle of the upper floor, just left of the counter and near the bowl of pink bath foam. Finally, set the receptionist bear behind the front desk in the blue chair, facing the computer. Dreamy Room Level 636 depends heavily on these character positions because they explain the room’s story. Once each bear is in the correct spot, Dreamy Room Level 636 feels complete, lively, and unmistakably organized.
Notes and Precautions
In Dreamy Room Level 636, the most common mistake is trying to place small accessories before the larger furniture. Start with walls, skylights, tubs, cabinets, stairs, and chairs first. After that, place towels, bottles, ducks, papers, and décor. Another important point in Dreamy Room Level 636 is alignment: the upper bath items sit in very tight rows, so a slightly misplaced tub or counter can stop several nearby objects from snapping into place. Watch the right side carefully, because the robe cabinet, cleaning tools, and six-door storage cabinet are packed closely together. On the lower floor, keep the lounge furniture centered on the wooden platform so the mushroom rug, tea table, and pond border remain visible. The final precaution in Dreamy Room Level 636 is not to ignore the small wall decorations, since the framed art, clock, certificate, and wall niche help the room look fully finished.
Tips and Tricks from top player
The best strategy for Dreamy Room Level 636 is to work from back to front and from top to bottom. Expert players usually finish the rear wall decorations, skylights, and tubs first, because those items anchor the upper half of Dreamy Room Level 636. Another useful trick is to group pieces by function: bath items near the pools, clothing items near the wardrobe, desk items around the receptionist, and lounge items around the chairs. This makes it easier to recognize where an unplaced object belongs. In Dreamy Room Level 636, pay special attention to visual themes. Bears, ducks, towels, robes, and toiletries all belong in the spa zone, while tea, pastries, chairs, rug, and magazines belong in the relaxation and entrance zone. When stuck, look for empty wall space, narrow floor edges, and surfaces that seem too plain. Those are usually where the final decorative items in Dreamy Room Level 636 need to go.
Final Scene Description of Dreamy Room Level 636
When Dreamy Room Level 636 is complete, the empty shell transforms into a gentle two-level bear bathhouse surrounded by greenery and water. The upper floor becomes a warm spa space with two soaking pools under glass skylights, cheerful rubber ducks, neatly folded towels, toiletries, a robe cabinet, and storage along the right wall. A giant sleeping bear peeks over the back wall, making Dreamy Room Level 636 instantly memorable. On the left, shower stalls, treatment beds, floral wall scrolls, and a towel rack create a full-service bath area. The stairs lead down to a lovely reception desk and a peaceful lounge with soft green chairs, tea, pastries, framed wall art, and a mushroom rug. Around the front edge, a lily-pad pond, flowers, fish, hedges, and a magazine stand complete the cozy atmosphere. The beauty of Dreamy Room Level 636 is that every item feels small and cute, yet each one must be placed exactly right.