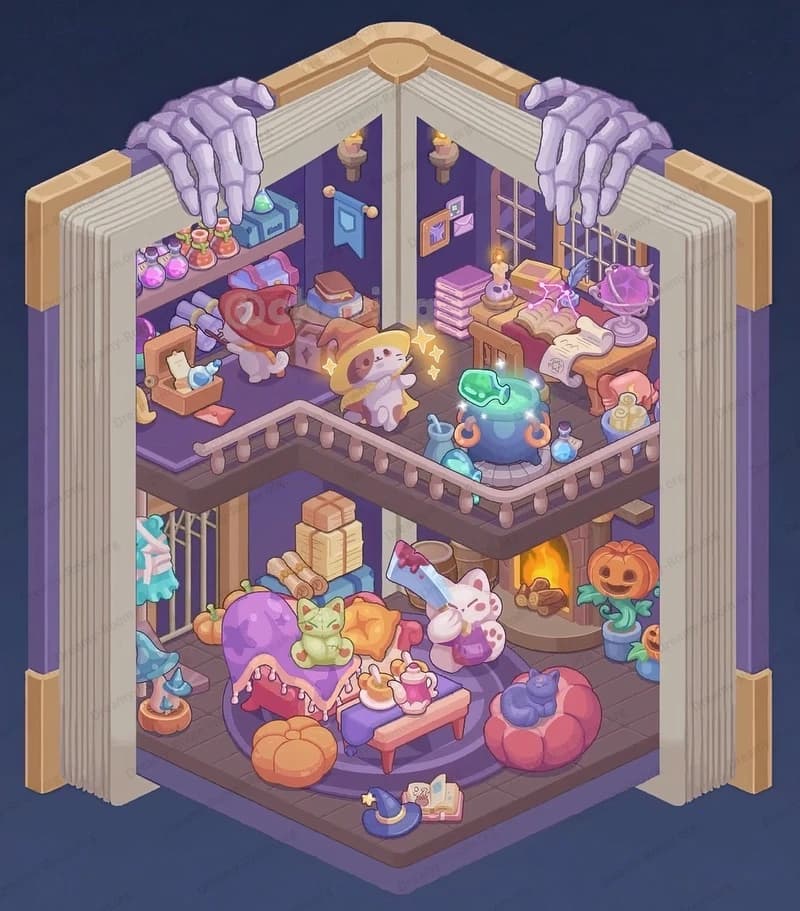
Dreamy Room Level 377
Dreamy Room Level 377 guide - Dreamy Room 377 Walkthrough & Solution.

Important Notice Regarding Level Numbering
Due to frequent changes in Dreamy Room's level numbering and differences between platforms (Android/iOS) – for example, level 377 on Android might not be the same as level 377 on iOS – the text guide below may not always match the images and video above. Please prioritize the image and video guides. If you find that the guide content doesn't match your current level, please visit the All Level Walkthroughs page to find the correct guide based on level images. Thank you for your understanding.
Dreamy Room Level 377 Walkthroughs & Guide
Step 1. Place the foundation elements: floor, raised platform, pond, stairs, and railings
Begin by laying down the wooden plank floor and raised platform that form the room’s base — these are the foundation for Dreamy Room Level 377. Place the L-shaped raised deck so the cutout for the pond sits on the right-front edge; on Dreamy Room Level 377 the pond opening aligns precisely with the decking’s lower right corner. Next add the short brick wall base around the platform and attach the pale turquoise railing posts and rails around the front edge and right side — these railings are crucial landmarks in Dreamy Room Level 377 because many objects (bench, low table) attach to or sit behind them. Put the stone steps on the front-left corner, flanked by two small lantern posts at the bottom of the stairs. Finally, fill the pond with lily pads, rocks, and the cluster of flowers at the pond’s far right so the waterbed matches the placement in Dreamy Room Level 377; placing the pond pieces early prevents other objects from overlapping later.
Step 2. Install the back walls, window, blinds, and hanging cloths
With the floor set, erect the green back and left walls so the large arched interior opening sits center-left on the back wall — this opening is the mirror/bed alcove anchor in Dreamy Room Level 377. Place the rectangular window on the right wall, then add the rolled bamboo blind over it (the blind hangs down with three tassels) — in Dreamy Room Level 377 the blind’s bottom edge aligns slightly above the counter height so the bench and table sit neatly under the window. Hang two long decorative cloths/towels over the top ledges: one on the left wall corner and a patterned green cloth draped on the right corner. Add the small decorative fan motif on the left-back wall above the alcove to echo the reference image for Dreamy Room Level 377.
Step 3. Create the alcove: bed area, mirror frame, curtains, and small shelf items
Now build the ornate alcove on the left-back wall: place the carved wooden frame/mirror with tiny draped curtains and layered bedding visible inside — this is the focal bedroom niche in Dreamy Room Level 377. Position the low shelf unit directly beneath the left side of the alcove and fill its cubby holes with stacked towels and rolled cloths so they peek out on Dreamy Room Level 377’s left area. Attach two hanging tassel lanterns on either side of the alcove frame to match the warm glow in Dreamy Room Level 377. Small decorative items (folded blankets, a tiny pot, and a blue dish) sit on the shelf surfaces; place them now so their positions are locked relative to the alcove in Dreamy Room Level 377.
Step 4. Lay the central rug and main seating: table, tea set, and gift box
Place the rectangular red area rug centrally on the platform — it should sit slightly to the right of the alcove so the round tea table nests on it. In Dreamy Room Level 377 the round table is centered on the rug: center the ornate tablecloth, then set the tea tray with three teacups and a small teapot plus stacked treats (a box of sweets and a small cake). Add a wrapped gift box and a plate of colorful sweets on the table; these exact props are signature elements of Dreamy Room Level 377. The tea table’s height should match the low seating so the cups align visually. This step is essential in Dreamy Room Level 377 because misplaced tabletop items will overlap later decorative pieces.
Step 5. Position the character figure (bunny) and its flankings: small tables and lanterns
Place the central mascot — the dressed bunny figure — slightly in front of the alcove center and slightly left of the round table; on Dreamy Room Level 377 the bunny sits facing forward with its back against the alcove frame. Flank the bunny with two small round lamp stands (red lanterns on short pedestals): one to the left, one to the right, each positioned a short step forward from the alcove. Add tiny accessory trays, a small blue floral vase, and a decorative fan near the bunny so the character appears surrounded and adored — these placements are specific to Dreamy Room Level 377 and give the scene its celebratory feel. When placing the bunny in Dreamy Room Level 377, ensure the base of the figure overlaps the rug slightly so it reads as part of the rug vignette.
Step 6. Fill the left corner: shelving, cabinet, standing mirror, bamboo, and lantern pole
Turn to the left-front corner and install the tall shelving cabinet with drawers and little books stacked on top — in Dreamy Room Level 377 the cabinet sits flush against the left wall, just before the stair ledge. To the immediate right of that cabinet place the small standing mirror/ornamental stand and arrange the folded fabrics and tiny trinkets on the bench nearby. Add the bamboo plant cluster to the far left edge by the stairs, and set the tall vertical lantern pole beside it to match the reference. These components are visible in Dreamy Room Level 377’s left area and help anchor the room; placing them now ensures the left corner balances the right-side tree and pond in Dreamy Room Level 377.
Step 7. Add front seating and low furnishings: bench, rolling mat, cushion, and small display
On the front edge of the platform place the low wooden bench parallel to the railing; in Dreamy Room Level 377 a rolled green mat sits on the bench with a pair of small decorative fans and a cushion in front of it. Place a short low table with a small artwork stand to the left of the bench, and arrange a flower bowl and a tray with crafting items on it. Attach a short section of fence rail around these pieces so they feel enclosed — these rail segments match Dreamy Room Level 377’s front composition. Ensure the bench and mat are centered between the two front railing posts so the visual balance of Dreamy Room Level 377 is preserved.
Step 8. Finish the right side: tree, pond lantern, plants, hanging scrolls, and small vessels
Complete the scene by placing the large stylized tree on the right-rear corner (its trunk slightly behind the right railing and branches extending above the window) — this tree is a major silhouette in Dreamy Room Level 377. Add the tall vase and tea set on the right counter under the window, then hang the two vertical scroll paintings on the back wall between the alcove and window. Place the small golden pond lantern on the edge of the pond and add the remaining aquatic flowers and stones so the pond matches Dreamy Room Level 377’s composition. Finally scatter tiny decorative elements — a small stool, an extra teacup, and a folded scroll on the counter — to match the density found in Dreamy Room Level 377 and complete the decorative layering.
Notes and Precautions
- Collision order: place large static pieces first (floor, walls, railings, tree, pond) then medium pieces (bench, alcove, rug), and finish with small props (cups, trinkets, tassels). This ordering is essential for Dreamy Room Level 377 because many tiny objects snap to specific anchors; placing the base items later causes overlaps and placement errors in Dreamy Room Level 377.
- Z-index and overlaps: when you place the bunny, bench, or tea table in Dreamy Room Level 377, make micro adjustments to avoid clipping — a single tile shift horizontally can stop a cup from sinking through a rug. For Dreamy Room Level 377, always preview the scene in the camera view to verify depth.
- Symmetry vs. authenticity: the reference for Dreamy Room Level 377 has deliberate asymmetry (tree on the right, bamboo on the left). Don’t force mirror symmetry; maintain these anchor differences so your Dreamy Room Level 377 matches the original artwork.
- Lighting cues: lantern heights matter — matching the lantern post heights in Dreamy Room Level 377 ensures shadowing and perceived depth are correct. If a lantern looks too low, move it up a half-tile to match the visual weight in Dreamy Room Level 377.
Tips and Tricks from top player
- Use anchor mode (if the game supports it) to lock the major structures first so you can freely position the smaller objects in Dreamy Room Level 377 without accidentally moving the base. Top players on Dreamy Room Level 377 always lock the floor and railings.
- Snap grid micro-moves: for Dreamy Room Level 377, employ micro nudges (one-step nudges) for cups and tassels — they often need subtile offsets to sit visually correct on round tables. Veteran builders of Dreamy Room Level 377 recommend nudging items diagonally for the best isometric look.
- Save checkpoints: after completing each major step (foundation, alcove, central rug), save a checkpoint in Dreamy Room Level 377. This prevents having to redo earlier work if you misplace a high-value small prop.
- Color contrast check: step back and view the whole room at reduced zoom to ensure objects like the bunny and tea set pop correctly in Dreamy Room Level 377. If the bunny blends into the background, move a small lamp or adjust the rug hue slightly to restore visual contrast — pro Dreamy Room Level 377 players use this trick to make focal elements pop.
- Decorative clustering: group three to five small items together (cups, sweets, flowers) on a surface for an authentic look in Dreamy Room Level 377 — isolated single items look sparse compared to clustered groupings favored in Dreamy Room Level 377 designs.
Final scene description
The finished Dreamy Room Level 377 scene reads as a peaceful, domestically festive vignette: a warm wooden platform edged with pale turquoise railings overlooks a lily-studded pond that glows softly beside a gnarled ornamental tree. To the left, a carved alcove bed framed by curtained panels shelters the dressed bunny figure centrally, flanked by red lanterns and a small shelf of neatly folded textiles. The center rug anchors a round tea table piled with cups, sweets, and a wrapped gift, while cabinets and bamboo shrubs fill the left approach. On the right, a window with a bamboo blind, hanging scrolls, and a small tea counter balance the tree and pond lanterns. Every surface hosts carefully arranged trinkets — fans, cushions, a rolled mat, and tiny vases — placed exactly as required to pass Dreamy Room Level 377. The room’s composition emphasizes thoughtful placement: the main challenge of Dreamy Room Level 377 is matching each object to its correct tile so the whole tableau feels naturally lived-in and complete.


