Dreamy Room Level 187
Dreamy Room Level 187 guide - Dreamy Room 187 Walkthrough & Solution.

Important Notice Regarding Level Numbering
Due to frequent changes in Dreamy Room's level numbering and differences between platforms (Android/iOS) – for example, level 187 on Android might not be the same as level 187 on iOS – the text guide below may not always match the images and video above. Please prioritize the image and video guides. If you find that the guide content doesn't match your current level, please visit the All Level Walkthroughs page to find the correct guide based on level images. Thank you for your understanding.
Dreamy Room Level 187 Walkthroughs & Guide
Step 1. Place the elevator system on the left wall
In Dreamy Room Level 187, the first challenge is to install the elevator system precisely on the left interior wall. Place the twin silver elevator doors flush against the left wall tiles, ensuring the panels align perfectly with the underlying grid. Directly above these doors, affix the rectangular floor indicator display showing “1” with its yellow triangle icon—an unmistakable detail in Dreamy Room Level 187. To the right of the elevator, mount the black button panel featuring up and down arrows, replicating the exact placement required in Dreamy Room Level 187. On the adjacent wall to the left, install the blue-framed notice board at eye level, matching Dreamy Room Level 187’s subtle signage. Finally, lay the rectangular brown doormat centrally in front of the elevator doors and add a small potted leafy plant to the right of the mat, framing the entrance just as intended in Dreamy Room Level 187.
Step 2. Install the glass-enclosed meeting room at center of the lower level
For Dreamy Room Level 187, the next step is to build the glass-walled meeting room at the exact center of the ground floor. Begin by placing four dark grey metal posts on the floor grid, forming a perfect rectangle beneath the upcoming upper walkway in Dreamy Room Level 187. Clip the transparent glass panels into each post, creating seamless walls that match the game’s aesthetic. Fit the sliding glass door—complete with its slender black handle—into the front panel, checking that it glides smoothly in Dreamy Room Level 187’s enclosure frame. Inside this meeting pod, position the white rectangular conference table exactly in the middle and arrange four light blue swivel chairs evenly around it, just as professional players of Dreamy Room Level 187 do. Finally, add a potted plant outside the entrance to mirror the welcoming office vibe that defines Dreamy Room Level 187.
Step 3. Arrange the workstations, computers, chairs, and character figures on the ground floor
Next in Dreamy Room Level 187, focus on populating the lower floor with two adjacent workstations. In Dreamy Room Level 187, align each white desk side by side against the front glass railing, leaving a consistent gap between them. Fit a blue swivel chair at each desk, facing inward toward the meeting room, just as the official layout in Dreamy Room Level 187 prescribes. On each desk in Dreamy Room Level 187, place a black PC tower to the right of the monitor, then center the monitor, keyboard, and mouse directly in front of the chair. For a playful touch in Dreamy Room Level 187, add the dog figurine on the left desk and the penguin figurine with glasses and red bowtie on the right desk, ensuring that players of Dreamy Room Level 187 capture every bit of the office’s charming personality.
Step 4. Set up the kitchenette and hydration station on the right side of the lower level
In Dreamy Room Level 187, the right corner of the ground floor becomes a cozy kitchenette and hydration hub. First, place the white water cooler base flush against the right wall and top it with a transparent blue water jug, replicating how Dreamy Room Level 187 positions it. Then set two additional water jugs side by side on the floor next to the cooler, matching Dreamy Room Level 187’s refill station. On the built-in blue countertop in Dreamy Room Level 187, arrange a yellow blender, a green coffee grinder, and a green microwave in a neat row. Above these appliances, install two wooden floating shelves and place three small round storage jars with colored lids, faithfully reproducing the cupboards in Dreamy Room Level 187. Finally, position a clear plastic cup with a straw on the floor near the glass railing to complete the refreshment corner in Dreamy Room Level 187.
Step 5. Add the transparent glass railings around both lower and upper levels
Now in Dreamy Room Level 187, outline the entire workspace with transparent glass railings to define the office flow. For Dreamy Room Level 187, clip each glass panel segment along the front edge of the lower platform using dark grey corner connectors, ensuring a sturdy fit. Continue to place railing segments along the left and right edges of the ground floor, enclosing the space exactly as designed in Dreamy Room Level 187. Next, in Dreamy Room Level 187, mirror this process on the upper walkway by aligning panels to the same height and connector positions. This precise alignment of railings in Dreamy Room Level 187 not only secures the layout but also maintains the clean isometric aesthetic that makes this level so memorable.
Step 6. Furnish the upper walkway lounge with bench, table, and plants
In Dreamy Room Level 187, the upper walkway transforms into a tranquil lounge terrace. First, in Dreamy Room Level 187, place the grey cushioned bench seat flush against the glass railing on the right walkway. Next, situate the small white ottoman beside the bench, replicating Dreamy Room Level 187’s cozy seating arrangement. Then, in Dreamy Room Level 187, add the dark wooden square coffee table in front of the bench. On the table, within Dreamy Room Level 187, arrange a potted white-flowered plant resting on a delicate lace doily. Finally, in Dreamy Room Level 187, position a tall leafy potted plant in the far right corner near the windows, bringing natural vibrancy and perfect balance to the decorated terrace.
Step 7. Decorate the CEO office with desk, chair, accessories, windows, and lighting
To complete Dreamy Room Level 187, furnish the top level’s executive corner with precision. In Dreamy Room Level 187, place the dark grey L-shaped desk against the back wall, situating it directly beneath the white air-conditioning unit. Next, in Dreamy Room Level 187, add the high-backed executive chair behind the desk, centering it perfectly. On the desk for Dreamy Room Level 187, arrange a black “CEO” nameplate, a yellow corded telephone, a ceramic coffee mug, a wooden pencil holder filled with pens, two upright books, and a small potted cactus. Above this setup in Dreamy Room Level 187, mount the air-conditioning unit. Then install two tall windows with white roller blinds and grey track spotlights on the right wall in Dreamy Room Level 187. Finally, in Dreamy Room Level 187, hang the yellow wall clock between the windows and complete the binder-filled bookshelf with a decorative vase on the adjacent wall.
Notes and Precautions
When navigating Dreamy Room Level 187, precision placement is essential to recreate the scene exactly and unlock the next level. Be aware that objects in Dreamy Room Level 187 often snap to an invisible grid, so slight misalignments can cause items to overlap or refuse to lock into place. Always check the edges of the floor tiles when positioning large elements like glass railings or desks in Dreamy Room Level 187. Additionally, smaller accessories such as the miniature cactus or decorative jars in Dreamy Room Level 187 may require zooming in to select accurately. The game does not provide a timer during Dreamy Room Level 187, but impatience can lead to placement errors. Take your time and ensure each item rings into place with a confirmation highlight. Remember the narrative reminder at the heart of Dreamy Room: every object carries meaning and must sit in its designed spot . Skipping this mindful approach in Dreamy Room Level 187 can result in a less satisfying final tableau.
Tips and Tricks from top player
Top players of Dreamy Room Level 187 recommend starting by placing the largest structural elements first—such as the elevator doors, glass railings, and meeting room enclosure—before moving on to smaller decorative items. When tackling Dreamy Room Level 187, use the zoom function to fine-tune the position of tiny accessories like the potted cactus and storage jars without accidentally dragging neighboring objects. Players in Dreamy Room Level 187 have found that rotating furniture at 90-degree increments helps align desks and chairs to the tile grid perfectly. For Dreamy Room Level 187, duplicate successful layouts by taking a mental screenshot before rearranging complex sections; this prevents having to rebuild the entire scene if an item snaps out of place. Finally, experienced users of Dreamy Room Level 187 advise grouping similar tasks—such as all potted plants or all electronic appliances—so you maintain a clear workflow. With these tricks, Dreamy Room Level 187 feels less daunting and more satisfying to complete.
Final Scene Description
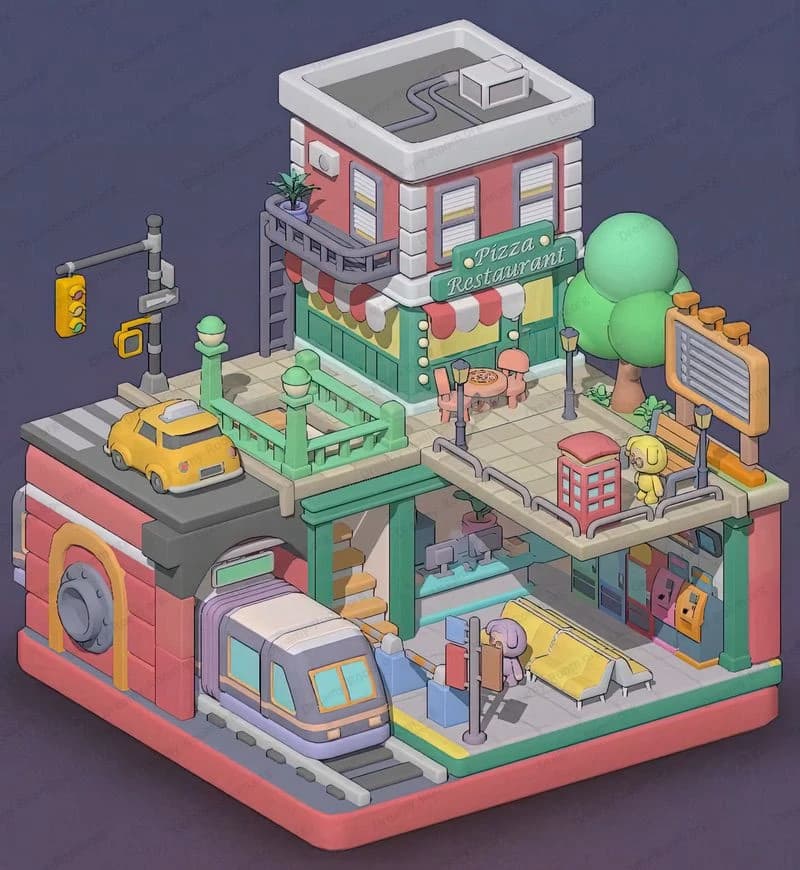
Dreamy Room Level 187 culminates in a beautifully arranged two‐story office space viewed in gentle isometric perspective. The lower level features a sleek glass-walled conference room at center, flanked by twin workstations with blue swivel chairs, desktop computers, and two whimsical character figures—a friendly dog and a penguin—busy at their desks. To the left, a modern printer and blue framed notice board rest beside a vertical garden of blooming white flowers. On the right, a modern kitchenette offers a water cooler with spare jugs plus blender, coffee maker, and microwave under floating wooden shelves. Transparent glass railings wrap the perimeter. The upper level reveals a luxurious CEO office with a sturdy desk topped with nameplate, coffee mug, rotary phone, cactus, and laptop, backed by a binder shelf and air conditioner. Adjacent, a cozy lounge bench and wooden coffee table holding a delicate floral arrangement complete this serene workspace.


