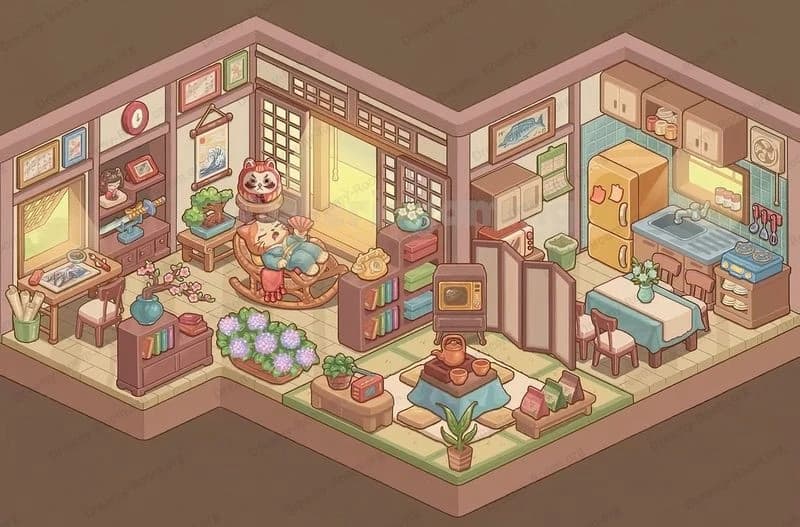
Dreamy Room Level 284
Dreamy Room Level 284 guide - Dreamy Room 284 Walkthrough & Solution.

Important Notice Regarding Level Numbering
Due to frequent changes in Dreamy Room's level numbering and differences between platforms (Android/iOS) – for example, level 284 on Android might not be the same as level 284 on iOS – the text guide below may not always match the images and video above. Please prioritize the image and video guides. If you find that the guide content doesn't match your current level, please visit the All Level Walkthroughs page to find the correct guide based on level images. Thank you for your understanding.
Dreamy Room Level 284 Walkthroughs & Guide
Step 1. Place the checkered floor and pink striped walls (base build)
Begin Dreamy Room Level 284 by laying the checkered pale-pink floor tile exactly in the center of the room and aligning it with the room’s perspective grid. In Dreamy Room Level 284 the floor’s light checkerboard anchors every furniture placement, so take your time: place the floor first, then add the pink vertical-striped wallpaper that wraps the two visible walls. Make sure the wallpaper panels line up with the wall corners and the slot for the window on the left wall; in Dreamy Room Level 284 that left window has a recessed sill which must remain empty until later. After the floor and wallpaper are fixed, add the rounded pink baseboard trim around the perimeter and the thicker rose-pink outer rim that visually frames the room. These base layers control depth — in Dreamy Room Level 284 get them perfect first or many items will look misaligned. Finally, set the room’s ambient light and subtle green background so the pastel tones in Dreamy Room Level 284 read correctly on-screen.
Step 2. Place the right staircase, mezzanine platform, and glass railing
Next in Dreamy Room Level 284 build the vertical circulation: place the right-hand pink staircase against the right wall, stepping up from the lower floor to the mezzanine. Ensure the staircase’s top landing lines up with the mezzanine platform; in Dreamy Room Level 284 the staircase must land at the small upper platform with the cupcake poster on the outer wall beside it. Once the stairs are positioned, create the mezzanine platform that sits above the lower counter area — extended toward the left but stopping short of the left wall — and attach the semi-transparent curved glass railing to the platform’s front edge. In Dreamy Room Level 284 the glass railing visually divides upper seating from lower service and needs careful depth ordering so desserts in upper display cases don’t clip through. Finally, add the small upper-right landing where a blue bear figurine will later sit; correct placement of the staircase and mezzanine in Dreamy Room Level 284 ensures the rest of the upper decor fits naturally without overlap.
Step 3. Place lower counters, display cases, and register (main service area)
Now outfit the lower area of Dreamy Room Level 284 with counters and display cases. First place a wide lower counter along the back wall and fit two glass display cases on top — one near the left corner and one center-front — each filled with pastries. Position the cash register and a small purple cashier plush behind the center counter, pointing the register screen toward the room entrance. Add stacks of plates, a utensil stand, and a decorated lower counter skirt with purple bows across the front, as seen in Dreamy Room Level 284. On the left side place the takeaway bags and boxed pastries on shelving and a single cake slice on a wooden display peg. Put two potted green plants — one to the left front and one near the right corner behind the lower display case — and place pastel jars (candy canisters) against the back wall near the stairs. In Dreamy Room Level 284 the precise X/Y offset of each counter piece matters for layering: lock the counters first, then place the register and small items so they sit visually in front of the counters and inside the display cases.
Step 4. Place upper tables, chairs, desserts, characters, and finishing decor
Finish Dreamy Room Level 284 by filling the mezzanine and entrance with character and tabletop details. Place three round café tables on the mezzanine, each with pink tablecloths and paired with toasted-beige biscuit-shaped chairs; on each table set dessert plates (pancakes, parfaits, small cakes) and place spoons to the right of plates. On the lower floor, place a second glass display case near the front entrance and a bunny character standing on a pink mat by the door facing inward. Add the sandwich board menu sign just outside the entry steps and the small purple bear figurine atop the stair landing. Scatter a few decorative bows on counter skirts and set a cupcake poster on the right wall beside the stairs. In Dreamy Room Level 284 balance is key: place large items first (tables, cases, characters) then add plates, desserts, and utensils so they remain visually on top and do not disappear behind glass or rails. Double-check that the curved glass railing sits in front of the mezzanine chairs and that the upper display case sits flush against the back wall.
Notes and Precautions
- The main challenge in Dreamy Room Level 284 is correct placement and layering: many objects overlap (glass rail in front of booths, display case lids over pastries), so always use depth ordering tools and lock layers after positioning each group.
- When you move a display case in Dreamy Room Level 284, check its collision box — transparent lids often extend visually beyond the physical base; nudge items forward/back by a few pixels to avoid clipping.
- Save frequently during assembly. Dreamy Room Level 284 contains many small decorative assets (spoons, plates, pastries) that are easy to lose during bulk edits. If your editor supports grouping, group tables with their chairs and individual display cases with their contents in Dreamy Room Level 284 to make later moves safe.
- Color matching matters: match pastel hues so the bakery reads cohesive in Dreamy Room Level 284 — adjust saturation slightly if items look too bright under the room’s green background.
Tips and Tricks from top player
- Work big-to-small in Dreamy Room Level 284: place floors, walls, stairs, mezzanine, and counters first, then add display cases, then plates/desserts, then characters. This minimizes rework.
- Use snapping and a shallow grid when positioning the glass railing and mezzanine in Dreamy Room Level 284 — it prevents micro-offsets that look wrong in isometric perspective.
- Duplicate and mirror chairs and plates in Dreamy Room Level 284 instead of placing each from scratch; tweak a few duplicates for variety (rotate spoons, nudge desserts).
- Lock completed groups (for example, each display case and its pastries) so accidental moves don’t ruin the composition in Dreamy Room Level 284.
- When layering characters (bunny, cashier plush, stair bear) in Dreamy Room Level 284, place the character on a small floor mat to anchor them visually and prevent z-index flicker.
Final scene description
The completed Dreamy Room Level 284 is a pastel bakery with an inviting two-story layout: a pale-pink checkered floor and vertical striped pink walls cradle a warm service counter and twin glass pastry cases below, while a curved glass railing crowns a cozy mezzanine with three round pink-draped tables and biscuit-shaped chairs above. The right side features a sweet pink staircase with a cupcake poster beside it and a small blue bear perched on the landing. A friendly bunny stands on the entrance mat; a sandwich-board menu waits beside the steps. Counters are dressed with stacks of plates, utensil caddies, pastel candy jars, and wrapped takeaway bags. Delicate bows decorate the counter skirts, while potted plants soften corners. Every display case contains neatly arranged cakes and pastries; tiny spoons, plates, and a cash register complete the scene. Dreamy Room Level 284’s charm comes from careful placement and layering — the delightful final tableau reads like a miniature storybook café where every object has its perfect place.


