Dreamy Room Level 205
Dreamy Room Level 205 guide - Dreamy Room 205 Walkthrough & Solution.

Important Notice Regarding Level Numbering
Due to frequent changes in Dreamy Room's level numbering and differences between platforms (Android/iOS) – for example, level 205 on Android might not be the same as level 205 on iOS – the text guide below may not always match the images and video above. Please prioritize the image and video guides. If you find that the guide content doesn't match your current level, please visit the All Level Walkthroughs page to find the correct guide based on level images. Thank you for your understanding.
Dreamy Room Level 205 Walkthroughs & Guide
Step 1. Place the Coastal Base Platform
In Dreamy Room Level 205, the very first move is to establish your foundation by placing the coastal base platform. On the empty pastel tile you’re presented with, select the square panel that features the gentle wave crest at its edge. Drag and snap it so that the water meets the bottom-left corner of your grid—this sets the stage for the entire scene. In Dreamy Room Level 205, precision is key: align the pale sand surface flush with the top edge, and ensure the aquamarine sea curves naturally along the boundary. Take your time in Dreamy Room Level 205 to rotate the tile if needed—slight misalignment now can ripple through later steps. Remember that in Dreamy Room Level 205, getting this base placement perfect prevents frustration when layering additional elements.
Step 2. Add the Tiki Bar Structure
In Dreamy Room Level 205, your next challenge is to erect the charming tiki bar centerpiece. Choose the thatched straw roof piece first: drag it to hover above the center-back of the platform until it snaps into position. Next, select the matching mint-green bar counter and align it directly beneath the roof, ensuring the counter’s front face points outward. Then add the wooden bar floor extension, slotting it seamlessly into the platform’s edge. During Dreamy Room Level 205, watch for snap indicators—they’ll glow when the pieces are correctly aligned. Finally, place the two barstools in front of the counter, evenly spaced so guests can “sit.” If you drift off grid, simply hit undo and re-drag: in Dreamy Room Level 205, the game rewards careful placement.
Step 3. Position the Palm Trees
In Dreamy Room Level 205, lush greenery transforms the scene into a tropical haven. Start by selecting the two largest palm trees and place them on the left side, just behind the surfboards—one slightly forward, the other angled back. Then choose two medium palms and situate them directly behind the tiki bar’s rear corners, framing the roof’s edges. Lastly, pick a smaller palm and drop it behind the right-side dining table setup, its fronds cascading over the walkway. As you place each palm in Dreamy Room Level 205, listen for the “snap” sound; it indicates perfect alignment. Use the rotate tool sparingly in Dreamy Room Level 205 to avoid unnatural overlaps. Proper palm placement will give depth and authenticity to your level—miss this in Dreamy Room Level 205, and the scene looks flat.
Step 4. Arrange the Deck Chairs and Loungers
In Dreamy Room Level 205, it’s time to outfit the beach with comfortable seating. Select the blue-striped deck chairs and place one on the wooden deck area to the left of the tiki bar, facing the water at a slight angle. Then position the second deck chair on the right side of the front platform, ensuring it mirrors the first for balance. Next, click on the yellow-cushioned sun lounger and nestle it under the red-and-white umbrella on the left platform. Finally, add the small round side table between the two left loungers, and top it with a frosty drink. For Dreamy Room Level 205, note that spacing is crucial: the stools and chairs shouldn’t overlap, or the game will reject your placement. Always zoom in to verify in Dreamy Room Level 205.
Step 5. Scatter Beach Accessories
In Dreamy Room Level 205, little details bring the shoreline to life. Begin by placing the unicorn float in the shallow water on the bottom-left, angling it so its head points toward the shore. Then scatter the beach ball and seashells across the sand—one shell near the water’s edge, another beside the sun lounger. Add the life ring at the front-right corner of the platform, then position the small coral piece just inland from the waves. In Dreamy Room Level 205, the key challenge is spacing each accessory naturally; avoid uniform grids. Finally, drop the starfish slightly overlapping the water line—this specific spot is crucial in Dreamy Room Level 205, and you’ll know it’s correct when the object subtly “glows” on placement.
Step 6. Set Up the Central Bar Seating
In Dreamy Room Level 205, creating a welcoming bar scene hinges on correct stool and accessory placement. Select the four mint-green barstools and arrange three in front of the counter—one directly centered, the other two flanking it. Place the fourth stool behind the counter for the bartender character later. Next, choose the drink trays: position one on the counter’s left edge and one on the right, ensuring they don’t overlap the stool placements. Add the decorative flower garland across the bar front. During Dreamy Room Level 205, use the alignment grid view to keep everything straight. If objects jitter, slightly nudge them with arrow keys: in Dreamy Room Level 205, micro-adjustments often solve placement issues.
Step 7. Add Decorative Signage and Props
In Dreamy Room Level 205, directional signs and props enrich the narrative. Click on the wooden signpost and slot it to the far-left, next to the surfboards—rotate so the arrows point upward. Then select the trio of colorful surfboards and lean them against the left platform’s railing, ordering them from smallest to largest. Next, place the potted plant on the right side of the tiki bar’s back wall where there’s a small bracket. Finally, choose the barrel-shaped cooler and place it under the bar counter, slightly to the right. In Dreamy Room Level 205, look for the subtle white outline that indicates valid placement; this helps you avoid invisible collisions. Properly placed props in Dreamy Room Level 205 complete the immersive feel.
Step 8. Position the Character Figures
In Dreamy Room Level 205, you’ll bring life to your scene with two character figures. First, select the fox figure and place her on the front platform, just right of center, holding her drink toward the bar. Then click on the dolphin-like friend and drag him to the front-left side of the bar counter, facing the bartender. Finally, add the frog bartender character behind the bar, ensuring he sits on the reserved stool placed earlier. In Dreamy Room Level 205, character orientation matters: face them toward each other to trigger the “conversation” animation. If they overlap, the level won’t register completion—only correct placement in Dreamy Room Level 205 counts.
Step 9. Arrange Tables and Dining Area
In Dreamy Room Level 205, the dining tables transform the right platform into a cozy café space. Select the two round tables and snap them to the far-right area, one closer to the bar and the other near the platform edge. Place the matching peach-colored chairs—two per table—angled in at 45°. Next, add the drinking glasses on each table: two on the table near the edge and one on the inner table. Then position the small fruit platter on the inner table and the banana bunch beside it. For Dreamy Room Level 205, double-check that none of the table legs overlap the walkway boundaries; correct placement will animate the chairs invitingly.
Step 10. Final Touches: Coral, Shells, and Accents
In Dreamy Room Level 205, it’s time to dot the scene with the final accents. Select the tiny coral cluster and place it near the waterline on the right side of the platform. Then scatter a few more seashells along both beach edges—one near the unicorn float, another by the fox’s feet. Next, choose the small potted succulent and position it beside the surfboard cluster on the left platform. Finally, pick the extra cocktail glasses and distribute them on any empty flat surfaces: the bar counter corner, the side table, and the sun lounger tray. These last details in Dreamy Room Level 205 are critical—the game’s main challenge centers on these precise placements. Once everything snaps into place, Dreamy Room Level 205 will shine.
Notes and Precautions
- Alignment Sensitivity: Dreamy Room Level 205 requires pixel-perfect alignment. Always zoom in when placing thin objects like surfboards and signposts to see the snap outlines.
- Undo and Nudge: If an object refuses to place, use the undo button, then micro-nudge with arrow keys. Dreamy Room Level 205 often struggles with slight overlaps.
- Layer Order: Ensure background elements (palms, base) are placed before characters and props. Dreamy Room Level 205’s engine may hide items if placed in wrong sequence.
- Rotation Limits: Only rotate objects within the permitted angle. In Dreamy Room Level 205, excessive rotation can deactivate snap guides.
- Resource Loading: Wait for all assets to load; a delayed bar model can fail to register placement. In Dreamy Room Level 205, patience prevents glitches.
Tips and Tricks from top player
- Grid Snap Hack: Toggle the grid view in Dreamy Room Level 205 to reveal invisible snap points—this uncovers hidden placement guides.
- Layer Locking: Lock the base platform once placed so you don’t accidentally move it while arranging other items in Dreamy Room Level 205.
- Quick Rotate: Hold Shift and scroll your mouse wheel to rotate objects in Dreamy Room Level 205 faster without overshooting target angles.
- Asset Palette Bookmark: Save frequently used props (like the sun lounger) to your favorites bar in Dreamy Room Level 205 for instant access.
- Checkpoint Saves: Use the level snapshot feature in Dreamy Room Level 205 after every three steps—this prevents you from losing progress if you misplace an object.
Final Scene Description
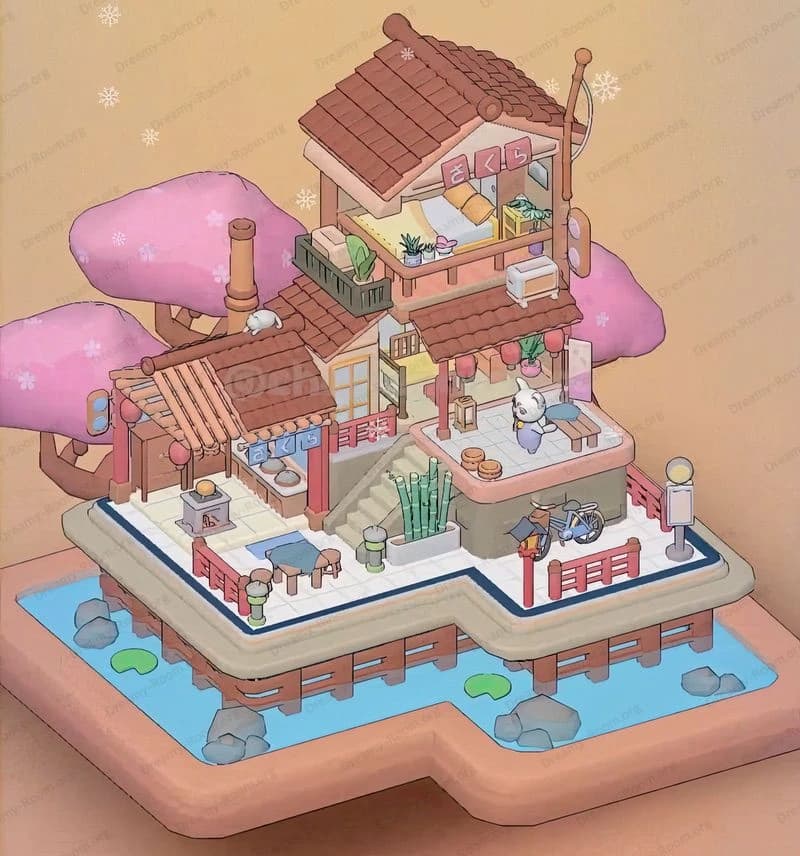
In Dreamy Room Level 205, you’ve crafted a tranquil beachfront oasis brimming with pastel charm. A thatched tiki bar sits center-back, flanked by five lush palm trees whose fronds sway gently. The bar counter, adorned with colorful cocktails and a playful flower garland, invites two character friends—a fox in a sundress and a dolphin—while a frog bartender readies another drink. To the left, two deck chairs under a stripy umbrella and a sun lounger host frosty beverages, with surfboards and a signpost adding coastal flair. The sandy shore is dotted with a unicorn float, seashells, a beach ball, and life rings, while the right platform features round tables with peach chairs, fruit platters, and more tropical cocktails. Final coral clusters and potted succulents complete the immersive tableau, showcasing the heart and detail of Dreamy Room Level 205 in a perfect harmony of décor and storytelling.


