Dreamy Room Level 401
Dreamy Room Level 401 guide - Dreamy Room 401 Walkthrough & Solution.

Important Notice Regarding Level Numbering
Due to frequent changes in Dreamy Room's level numbering and differences between platforms (Android/iOS) – for example, level 401 on Android might not be the same as level 401 on iOS – the text guide below may not always match the images and video above. Please prioritize the image and video guides. If you find that the guide content doesn't match your current level, please visit the All Level Walkthroughs page to find the correct guide based on level images. Thank you for your understanding.
Dreamy Room Level 401 Walkthroughs & Guide
Step 1. Place the wooden roof and left barrel-room shell at the upper left
Begin Dreamy Room Level 401 by laying the architectural bones. Snap the large wooden roof so its long ridge runs left-to-right across the top of the scene, with cream trim capping both ends. At the upper-left wall, dock the red cylindrical “barrel room” so its round cream frame faces outward and the tiny cross-window sits on that round end. The barrel’s beaded entry curtain should open onto the mezzanine, not the street. Under the roof’s left eave, tuck the neon beer-mug sign and blue arrow so they float just above the railing line. Getting these shell pieces right in Dreamy Room Level 401 ensures every later placement—from lamps to railings—snaps into the intended grid.
Step 2. Place the street entry, “Dreamy Bar” sign, and ground-floor front decor
Next in Dreamy Room Level 401, build the street approach. Attach the short staircase with blue handrails at the front-left corner, then mount the ornate “DREAMY BAR” sign directly behind it on a wooden post wall. Align two blue wall lanterns beneath the sign. To the right of the stairs, set a low planter strip with green shrubs and tiny pink blossoms; add a square trimmed hedge and a yellow planter cube on a wooden plinth. Fit a half barrel beside the steps. Place a short bench to the right of the planter; on the bench drop a brown hat and a large golden key. This front cluster in Dreamy Room Level 401 frames the ground floor and guides players to the interior.
Step 3. Place the music corner, round table set, and floor accents
Populate the left interior of Dreamy Room Level 401 with music and seating. Slide the upright piano against the left interior wall beneath the barrel room, keeping its keys facing the viewer. Add the small red piano stool in front, and perch the purple cat plush on the piano top for a playful accent. Center a round red table just to the right with four wooden chairs evenly spaced around it; three colorful bowls sit on top of the table. Near the table’s lower edge, position a small square side table, a red floor cushion, and a green-yellow toy block with an “X” face. This arrangement in Dreamy Room Level 401 leaves a clear walkway toward the stairs while showcasing the cozy lounge vibe.
Step 4. Place the right-side awning, rocking horse, and puddle base
On the front-right exterior of Dreamy Room Level 401, fix the red scalloped awning so it projects outward. Suspend a thick rope from the awning’s underside and hook the tan rocking horse to it. The horse faces left toward the stairs, and below it you must splash a glossy golden puddle base that matches the horse’s movement motif. Behind this, stand the tall blue plumbing stack with gold bands; let the vertical pipe rise to meet the upper brewing tank later. This step in Dreamy Room Level 401 delivers the street-side charm and sets the vertical anchor that balances the left barrel room mass.
Step 5. Install the staircase, mezzanine deck, railings, and pool-table zone
Now create the split-level heart of Dreamy Room Level 401. Place the tan staircase on the right interior, climbing from ground to mezzanine with five visible treads. Snap the mezzanine deck above the piano/table area, then ring it with cream balusters and posts. Center the green-felt pool table on the deck; add the blue triangle rack, two red cues (one leaning on the rail), scattered colored balls, and a chalk cube on the side tray. Place a small round side stool at the rail. Finally, add the blue cat character standing left of the table, hands on the cue. This placement in Dreamy Room Level 401 guarantees the railing gaps align with the cat and cue for that lively, mid-game look.
Step 6. Build the back-bar kitchen: sink, bottles, lamp, and wall items
For the service nook of Dreamy Room Level 401, step behind the mezzanine. Place the wooden counter with metal sink against the back wall; a brass faucet faces outward. On the counter’s left, group three bright bottles; to the right, set a cutting board with bread and a small pastry. Mount the hanging blue dome lamp above the counter, with its cord to the ceiling. Fix a wooden rack with hanging utensils and a small calendar marked “01” on the right wall near the counter edge. Add three framed playing-card tiles (club, heart, spade) to the far-right wall. Finally, insert the round barrel-style shelf with a wedge of cheese beneath the roof overhang and tuck a tiny flower pot and cactus near the left post. Correct spacing here in Dreamy Room Level 401 prevents collision with the roof beam.
Step 7. Attach the rooftop brewing tank and the blue pipe network
Finish the vertical build of Dreamy Room Level 401 by anchoring the bulky brewing tank over the right back corner. The round red-and-cream vessel sits on a blue platform with a droplet emblem on its front. Connect the golden outlet to the blue pipe you placed earlier so it descends along the right side, looping with small gold collars. Position a short spill tray under the platform edge. Add a few floating snowflake effects around the mezzanine and near the pool table—this level uses them as ambiance. With the tank, pipe, and flakes in place, Dreamy Room Level 401 achieves its playful steampunk-tavern silhouette.
Notes and Precautions
Dreamy Room Level 401 rewards exact snapping. Make sure the mezzanine railing pieces in Dreamy Room Level 401 leave a clean gap where the cat and cue overlap; otherwise the cue will clip. The staircase in Dreamy Room Level 401 must meet the mezzanine without protruding into the awning area. Keep the “DREAMY BAR” sign low enough to read but high enough that the front planters don’t cover it. When aligning the blue pipe in Dreamy Room Level 401, confirm the gold collars sit at the elbow joints. The rocking horse in Dreamy Room Level 401 needs its rope centered under the awning beam. Finally, the neon beer mug should sit beneath the left roof corner—not too high—or it will poke through the trim.
Tips and Tricks from top player
Veterans of Dreamy Room Level 401 recommend anchoring the roof and barrel room first so every later object references those edges. Use the round table as a compass in Dreamy Room Level 401: once centered, chair spacing reveals whether your ground-floor scale is correct. If the piano looks cramped, nudge the bench and planter line; Dreamy Room Level 401 is forgiving on the front curb depth. Drop the pool table before the cat so the cue angles match. Place the brewing tank last; it’s easier to route the pipe after confirming lamp and card-tile height in Dreamy Room Level 401. Don’t forget the hat-and-key bench—many players overlook it and lose time realigning the planter strip in Dreamy Room Level 401.
Final Scene Description
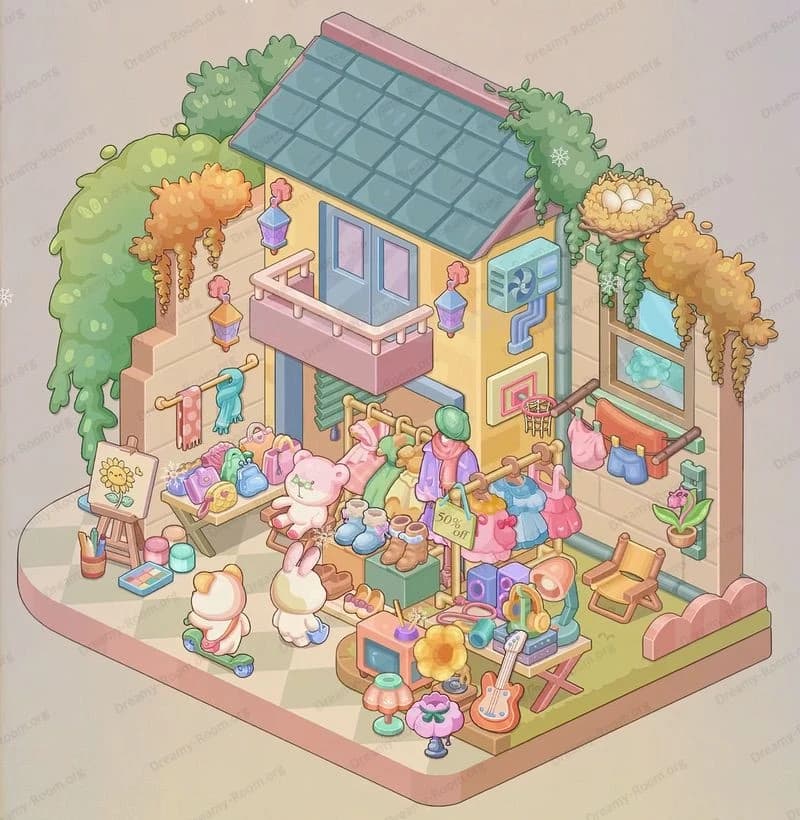
In the completed Dreamy Room Level 401, the teal room blossoms into a whimsical two-floor tavern. A red barrel room with a tiny cross-window hugs the left wall under a long wooden roof, where a neon beer mug glows. Below, a piano serenades a round table set with bowls, flanked by planters, a barrel, and a bench holding a hat and golden key. To the right, a red awning shelters a rope-hung rocking horse splashing in a shiny puddle. Stairs climb to a railed mezzanine where a blue cat lines up a shot on a green pool table. Behind it, a snug kitchen gleams with sink, bottles, lamp, utensils, and a “01” calendar, while card tiles decorate the wall. Overhead, a stout brewing tank feeds a blue pipe stack as snowflakes sparkle—Dreamy Room Level 401 at its coziest.


