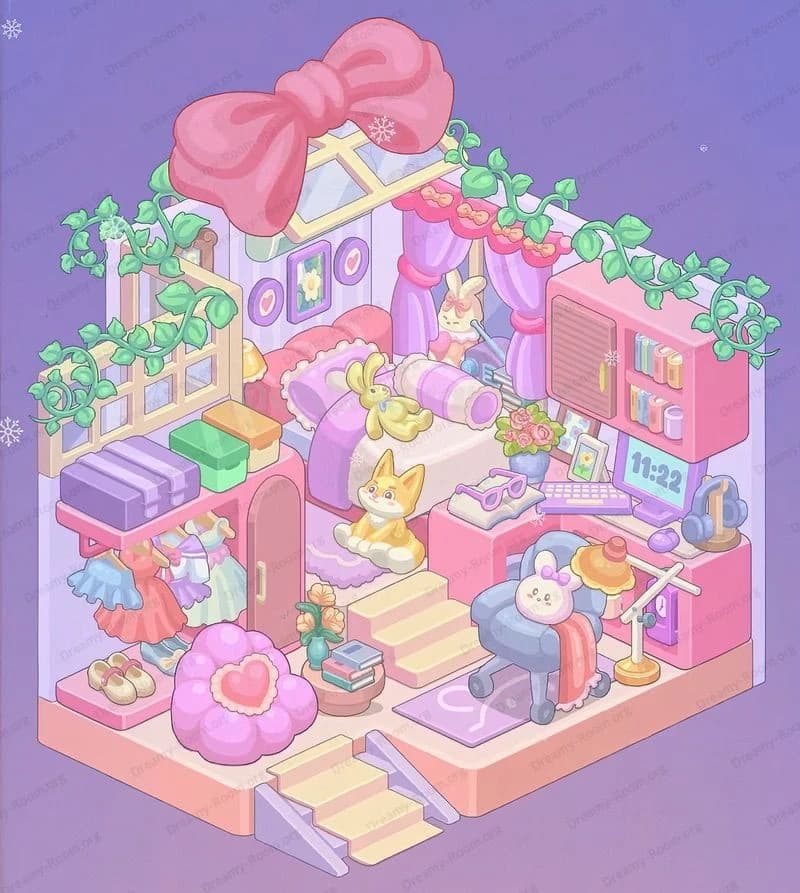
Dreamy Room Level 403
Dreamy Room Level 403 guide - Dreamy Room 403 Walkthrough & Solution.

Important Notice Regarding Level Numbering
Due to frequent changes in Dreamy Room's level numbering and differences between platforms (Android/iOS) – for example, level 403 on Android might not be the same as level 403 on iOS – the text guide below may not always match the images and video above. Please prioritize the image and video guides. If you find that the guide content doesn't match your current level, please visit the All Level Walkthroughs page to find the correct guide based on level images. Thank you for your understanding.
Dreamy Room Level 403 Walkthroughs & Guide
Step 1. Place the bin-house shell and open lid at the top
Begin Dreamy Room Level 403 by snapping the pale-aqua bin-house body into the frame so its rounded dome faces right. Rotate the hinged lid so it sits open at a jaunty angle, pointing up-left. The open lid is essential; it visually anchors the composition and creates the playful “dollhouse inside a bin” vibe. Make sure the darker blue rim runs around the bin’s top edge; if you mirror it, the interior floors will misalign. Check that the right side has the arched roof line—this will later line up with the circular window. Don’t place any interior items yet; keep this as your architectural base for Dreamy Room Level 403.
Step 2. Add the rooftop planter and circular porthole window
Next in Dreamy Room Level 403, install the scalloped white planter along the right exterior ledge of the top roof. Fill it with dense teal greenery dotted by small yellow and orange blossoms, all evenly spaced. Immediately to the left of the planter, center the round porthole window with a pale-blue cross mullion. The planter must hug the rim; if it sits too far inboard it will collide with the interior ceiling later. The window’s outer ring should read slightly darker than the dome so the cross divides the circle cleanly. These two details sell the toy-house charm of Dreamy Room Level 403 and guide players’ eyes downward to the living floors.
Step 3. Nest the trio of cotton-candy puffs under the lid
With the lid open, Dreamy Room Level 403 wants three fluffy “cotton-candy” balls tucked in the top recess. Place the yellow puff far left, the lavender puff at the back-center, and the pink puff front-right so the trio forms a soft arc. Keep them inside the lip of the bin so none sticks beyond the silhouette. Their pastel colors echo furniture hues you’ll use later; spacing them evenly prevents visual imbalance when you add dense furniture below. If the lavender sits too forward, it hides the window; if the pink slides left, it tangles with the planter. Think of this as the whimsical attic storage of Dreamy Room Level 403.
Step 4. Build the upper interior floor and the study corner (left)
Now create the first interior storey just beneath the rim. In Dreamy Room Level 403, the upper floor is a tan grid platform that slopes slightly at the front edge. Against the back-left wall, place a long pink study table with wooden legs. On its far left stands a teal succulent pot; to its right, open a book so pages face upward. Tuck a round pink ottoman beneath the front edge, slightly off-center. Behind the table, add a curved pink wall panel to imply shelves without clutter. Keep this zone airy: the table should sit close to the wall, leaving floor space for the central rug platform you’ll place next in Dreamy Room Level 403.
Step 5. Center the tiered rug island and the double-sided bookshelf
The heart of Dreamy Room Level 403’s upper storey is a scalloped, rose-pink rug island shaped like a puddle. Position it in the middle so its front edge nearly kisses the floor’s rounded lip. On top, anchor a blue, double-sided book tower. Facing left, stack three colorful books; facing right, slot upright spines in pastel rows. Place a tiny purple crystal or bauble on the top surface at the back-left corner. This island must not touch the walls; leave walkway space all around. If it overlaps the left study table or upcoming lounge, nudge it forward. This freestanding “library core” makes navigation readable in Dreamy Room Level 403.
Step 6. Create the lounge vignette with flower lamp and daisy cushion
On the right side of the same floor in Dreamy Room Level 403, drop a curved pink armchair with a tan cookie-like cushion. In front of it, lay down a plush daisy-shaped floor cushion—white petals and a yellow center—half overlapped by the rug island’s edge. Between chair and cushion, anchor a yellow flower-neck floor lamp with an orange base; its bloom should tilt inward, “lighting” the reading nook. Behind the chair, push a tall pink dresser against the back wall. In the far back-right corner, place a wooden pedestal with a leafy green plant in a pink pot. These four items—chair, lamp, cushion, dresser—must stay inside the rug boundary to read as a single cozy cluster in Dreamy Room Level 403.
Step 7. Install the lower floor: bedroom-media nook on the left
Drop the second interior storey below. For Dreamy Room Level 403 accuracy, the lower level hosts a left-side bedroom-media nook. Against the back wall, mount a compact bookcase with colorful spines and two framed pictures beneath a blue curtain rail. On the floor, arrange two pink heart-back armchairs facing forward, each with a puffy white pillow. Between them, park a tiny round side table topped with a teal lamp. In front of the pair, center a purple media cabinet with a yellow handle and small speakers or drawers at its feet. Add a tall silver floor lamp to the far left and a berry-laden plant (red berries, teal leaves) near the cabinet’s left edge. The cluster must feel tight and symmetrical to pass Dreamy Room Level 403’s placement hitboxes.
Step 8. Fit the kitchenette column, fridge, and sink block (right-center)
On the right half of the same floor in Dreamy Room Level 403, run a vertical support column up to the ceiling lip; this visually holds the upper floor. To its right, place a pink retro fridge turned slightly toward us so the cream handle is visible. In front of the column, align a blue sink-counter combo. On top of that counter, set a square cream basket with green tissue-like tufts and a red-fruit centerpiece; to its left, tuck a purple oven block with a small windowed door. The order from left to right should read: purple oven, blue sink with basket, pink fridge, then the blue arched entry set you’ll add next. Keep a walking strip between the kitchenette and the seating zone for Dreamy Room Level 403 flow.
Step 9. Finish the right wall: arched door, twin sconces, plant, and bench
Complete the right wall of Dreamy Room Level 403 by placing a bright blue arched door with a small window and gold handles. Flank it with two gold wall sconces—round, cup-like shapes that glow downward. To the door’s lower right, add a tall teal houseplant with big leaves in a pink pot sitting on a wooden stand. Along the glass wall, align a rosy pink bench facing the room; it must sit parallel to the round dining table you’ll drop next. This line of objects—sconces, door, plant, bench—balances the heavy kitchenette and opens a clear path from the entry to the seating and cooking areas, which is crucial for readable layouts in Dreamy Room Level 403.
Step 10. Lay the café corner: round table, pastries, and chairs
For the final interior cluster of Dreamy Room Level 403, center a small round pink table toward the front edge of the lower floor. Place two simple chairs—lavender left and periwinkle right—facing inward. On the tabletop set a white-frosted cupcake with a cherry to the left and a golden bundt cake on a stand to the right. Keep the nearby pink bench close enough to serve as overflow seating, but not so close that it touches the table’s base. This café vignette should align roughly with the media cabinet behind it, creating a relaxed triangle between lounging, cooking, and dining—an arrangement the placement logic of Dreamy Room Level 403 “likes” and will snap into success when each piece is within its tile grid.
Notes and Precautions
- Collision zones matter in Dreamy Room Level 403: the rug island must remain freestanding. If it kisses the left study desk or back wall, the lounge lamp may refuse to anchor.
- Maintain vertical symmetry: sconces must sit equidistant from the door arch; otherwise the game can flag the right sconce as “floating.”
- Depth layering is strict: place the cotton-candy trio before the planter so their edges tuck under the lid lip; reversing them can render overlap glitches.
- The kitchenette order—oven, sink, fridge—mirrors the art. Swapping the sink and oven will cause the fruit basket to clip the column in Dreamy Room Level 403.
- Keep the table slightly forward of center to avoid occlusion by the floor rim in the final camera sweep.
Tips and Tricks from top player
- Block out by zones first (exterior, upper floor, lower floor), then micro-adjust. Dreamy Room Level 403 rewards zoning with generous snap assists.
- Use color pairs to sanity-check placement: pink next to teal (planter), pink with yellow (lamp, pastries), purple with blue (book tower, media cabinet). If a color cluster feels off, you probably mis-tiled by one grid.
- The daisy cushion is your anchor on the upper floor. Place it first within the lounge cluster; then the chair and lamp naturally fall into the correct arc in Dreamy Room Level 403.
- If you struggle with the right wall, place the plant last. The door and sconces set the axis; the plant simply fills the negative space.
- Spin the camera slightly while placing the cotton-candy puffs to ensure none peeks outside the rim; that tiny misplacement can fail the final validation in Dreamy Room Level 403.
Final Scene Description
The completed Dreamy Room Level 403 scene becomes a whimsical, multi-storey micro-home nestled inside a sky-blue bin with its lid cheekily propped open. A scalloped planter of emerald leaves and sunny blossoms trims the right roof, while a circular porthole window gleams beside three pastel cotton-candy puffs tucked under the lid. Inside, the upper level hosts a calm study nook at left, a scalloped rug island with a double book tower in the center, and a pink lounge with a daisy cushion and flower-neck lamp to the right. Below, a cozy living-dining-kitchen floor unfolds: twin heart-back chairs and a purple media cabinet to the left, a compact kitchenette and pink fridge to the right, an arched door with golden sconces, a leafy plant and bench, and a round table crowned with pastry treats—every piece in its perfect place, just as Dreamy Room Level 403 promises.


