Dreamy Room Level 213
Dreamy Room Level 213 guide - Dreamy Room 213 Walkthrough & Solution.

Important Notice Regarding Level Numbering
Due to frequent changes in Dreamy Room's level numbering and differences between platforms (Android/iOS) – for example, level 213 on Android might not be the same as level 213 on iOS – the text guide below may not always match the images and video above. Please prioritize the image and video guides. If you find that the guide content doesn't match your current level, please visit the All Level Walkthroughs page to find the correct guide based on level images. Thank you for your understanding.
Dreamy Room Level 213 Walkthroughs & Guide
Step 1. Place the core room shell on the snowy cloud base.
In Dreamy Room Level 213, the very first placement involves positioning the empty isometric shell precisely onto the rounded, fluffy snow platform. When you start Dreamy Room Level 213, you’ll see only the pink walls and three transparent skylight panels above a soft white base that resembles a cloud. Carefully center the back and side walls so that the bottom edges align perfectly with the cloud’s edges. Ensure the roof beams sit flush against the top of the walls and that the skylight faces inward so you can admire the winter sky from inside. This foundational step in Dreamy Room Level 213 sets the stage for every subsequent decoration, so take your time to align it perfectly within the frame of Dreamy Room Level 213 before moving on.
Step 2. Place the bed in the center of the top floor.
Begin Dreamy Room Level 213 by dragging the cozy wooden bed frame into the middle of the lofted second level. In Dreamy Room Level 213, the plush reindeer-themed pillow belongs at the head of the bed, with the red-and-green striped duvet spread neatly across the mattress. Slide the pillow slightly forward so that the antler motif is clearly visible through the skylight, enhancing the festive atmosphere that defines Dreamy Room Level 213. Make sure the bed legs rest firmly on the pink floorboards without overlapping the walls or railing space. Once the bed is perfectly centered in Dreamy Room Level 213, you’ll have a comfortable focal point ready to receive the rest of the holiday decorations.
Step 3. Place the shelf and wall accessories on the back wall.
Once the bed is in place, enrich the upper back wall by adding a crisp white shelf. In Dreamy Room Level 213, locate the slender, rectangular shelf asset and snap it onto the center of the rear wall, just below the highest skylight panel. Dreamy Room Level 213 features several small decorative items: first, arrange four blue-bound books on the left side of the shelf, standing vertically with spines facing out. Next, position the small green succulent planter immediately to the right of the books, followed by the trailing ivy plant at the far right edge so it cascades naturally. Finally, mount the tiny wooden cuckoo clock above the shelf’s center, ensuring all components align perfectly within the Dreamy Room Level 213 space before proceeding. This completes the wall arrangement in Dreamy Room Level 213.
Step 4. Place the balcony railing and accessory table on the ledge.
In Dreamy Room Level 213, the balcony railing adds both safety and style to the loft area. Drag the curved wooden railing pieces around the outer edge of the second-floor platform until they click into place, ensuring the balusters are evenly spaced. Next, introduce the small purple side table onto the right section of the balcony, aligning its legs parallel to the railing. Dreamy Room Level 213 provides two additional items: set the open storybook on the tabletop and position the golden candlestick trophy beside it. Finally, in Dreamy Room Level 213, place the pair of plush purple slippers at the base of the railing on the left side, ready for cozy use. This setup enhances the charm of Dreamy Room Level 213 as you complete each detail.
Step 5. Place the floating staircase along the left wall.
To connect the two floors, Dreamy Room Level 213 requires a series of wooden step assets. Begin by selecting the staircase component, then position the bottom step flush with the left edge of the snow base. In Dreamy Room Level 213, the floating steps must ascend diagonally to the right, each piece snapping into the notch above the previous one. Carefully rotate and align every plank so that the incline flows smoothly to the balcony level without gaps or overlap. As you progress through Dreamy Room Level 213, take care that the staircase does not intersect the rocking chair area below or the railing above, ensuring seamless navigation between floors.
Step 6. Place the cozy corner under the staircase.
Dreamy Room Level 213 transforms the lower left zone into an inviting lounging spot. First, drag the plush wooden rocking chair to sit directly beneath the overhang of the stairs, angling it slightly toward the fireplace area. Next, in Dreamy Room Level 213, place the smiling Santa-themed plush doll on the rocking chair’s cushion, adjusting it so that its face looks outward. Then, add the small round pink rug at the foot of the stairs and position the wooden rocking horse on top of it, ensuring both align centrally. Dreamy Room Level 213 also includes a miniature tea set on a tiny table beside the chair—arrange the teapot and cups neatly. Finally, set the sleepy gray cat plush on its red cushion next to the chair, completing the snug atmosphere of Dreamy Room Level 213 beneath the staircase.
Step 7. Place the Christmas tree and green garlands on the walls.
Bring holiday spirit to Dreamy Room Level 213 by adding a decorated tree. Select the lush evergreen tree asset and place it on the lower right platform, slightly behind the room’s front edge so ornaments can hang freely. In Dreamy Room Level 213, ensure the red ribbon and golden star topper are visible from both floors, adjusting the tree’s angle if necessary. Next, apply the leafy green wall garlands along the right interior wall, embedding each end into the wall seams. Dreamy Room Level 213 rewards precision: the two garlands should form a graceful, symmetrical arc, framing the balcony access. This step in Dreamy Room Level 213 solidifies the festive ambiance before moving to exterior decorations.
Step 8. Place the outdoor decorations around the snowy base.
Dreamy Room Level 213 extends the cozy scene beyond walls by positioning exterior items on the snow field. Start with the two adorable snowmen: place the larger snowman at the front-left and the smaller one just behind it, both wearing purple scarves and red hats. In Dreamy Room Level 213, make sure they face the house, capturing the welcoming vibe. Next, hang the wooden Santa Home sign on a nearby pine tree asset, ensuring the board dangles just above the left snowman. Then, set the tall purple lamp post with its glowing snowglobe and red bow on the right side of the base. Finally, position the festive sleigh pulled by two reindeer at the front-right corner, stacking wrapped gifts inside. Enchant players with your mastery of Dreamy Room Level 213 when placing each outdoor piece.
Step 9. Place the snow details and finishing touches.
The final flourish in Dreamy Room Level 213 involves dusting the structure with snow accents. Select the snow layer asset and carefully map patches of white fluff along the roof edges, making sure they drip naturally over the eaves. In Dreamy Room Level 213, you’ll also place a snow cap on top of the chimney, tipping the piece so it appears freshly fallen. Then, distribute gentle snow swirls beneath the pine trees behind the house, blending them seamlessly into the cloud base. Dreamy Room Level 213 rewards keen attention: adjust any misaligned snow bits and rotate small flakes for realism. Once every snowy detail is in place, you have fully realized the Dreamy Room Level 213 winter wonderland.
Notes and Precautions
- The key challenge in mastering Dreamy Room Level 213 is precise placement. Objects will snap to grid points, so use slow, deliberate drags to avoid misalignment. Dreamy Room Level 213’s isometric perspective can make centering tricky, so zoom in if necessary.
- Some items, such as the floating staircase and balcony railing, may overlap if placed too close; Dreamy Room Level 213 requires leaving small gaps to prevent clipping issues.
- The game engine in Dreamy Room Level 213 occasionally registers placement errors if multiple decorations overlap within the same grid cell; clear surrounding space before finalizing each item.
- Keep an eye on inventory limits: Dreamy Room Level 213 prevents placing duplicates beyond the allotted count, so double-check your stock of each decorative element.
- Save your progress regularly, as Dreamy Room Level 213 does not include an auto-save feature during the decoration phase.
- Avoid rotating items too far from their default orientation, because Dreamy Room Level 213 is designed for specific angles that align with the room’s geometry.
Tips and Tricks from top player
- Group by zones: Veteran players suggest decorating Dreamy Room Level 213 by splitting the layout into roof, upper floor, lower floor, and exterior. This approach helps manage the inventory and prevents overlapping errors in Dreamy Room Level 213.
- Use multi-select: In Dreamy Room Level 213, hold the shift key to select and move adjacent items together, speeding up alignment on the isometric grid.
- Rotate in small increments: Dreamy Room Level 213’s rotation tool snaps at fixed angles; rotate each object in 15° increments to match the room’s perspective perfectly.
- Preview mode: Activate the game’s preview before final confirmation to catch any misaligned pieces—this shortcut is invaluable for Dreamy Room Level 213.
- Memory aids: Players often screenshot their layout mid-process to remember placement patterns. Reference these images when returning to Dreamy Room Level 213 after a break.
- Patience is key: The relaxed pace of Dreamy Room Level 213 rewards careful work; rushing can lead to frustrating misplacements.
Final Scene Description
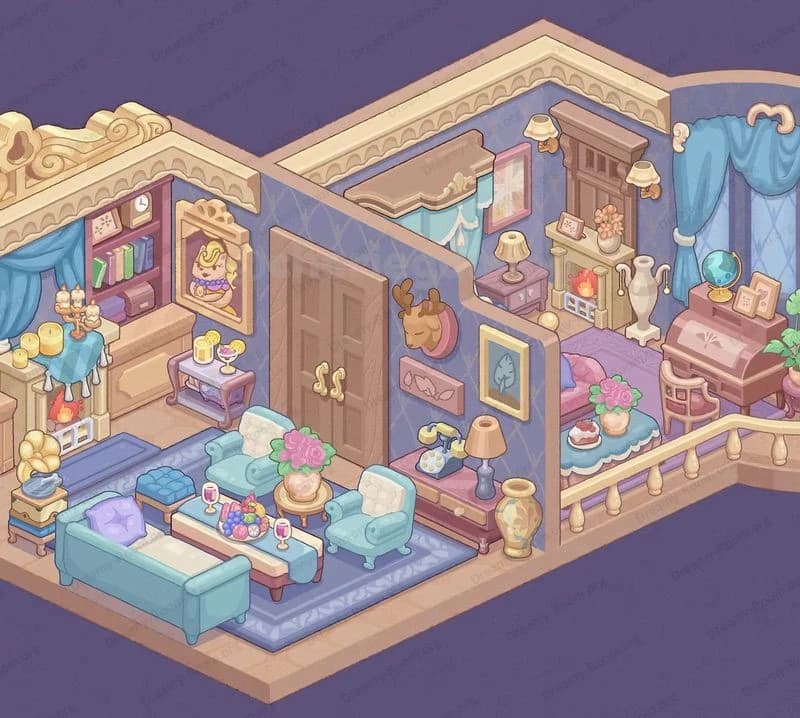
In the completed version of Dreamy Room Level 213, the tiny isometric winter cabin sits perched on a cotton-soft snow cloud, crowned by a snow-dusted pitched roof and chimney. Inside, the second-floor loft features a neatly made bed with a festive reindeer pillow under translucent skylights, flanked by a white shelf holding books, leafy planters, and a quaint cuckoo clock. An elegant wooden railing wraps around the balcony, where a purple side table displays an open book and a gleaming trophy in Dreamy Room Level 213’s classic style. A floating staircase descends to a cozy corner below, hosting a rocking chair cradling a Santa plush, a miniature tea set on the side, and a contented gray cat on its cushion beside a rocking horse. Along the lower level, a fireplace crackles beside a pink rug and glowing Christmas tree draped in green garlands. Outside, cheerful snowmen, a Santa Home sign, a bow-adorned lamp post, and a gift-laden sleigh pulled by two reindeer complete the festive tableau of Dreamy Room Level 213.


