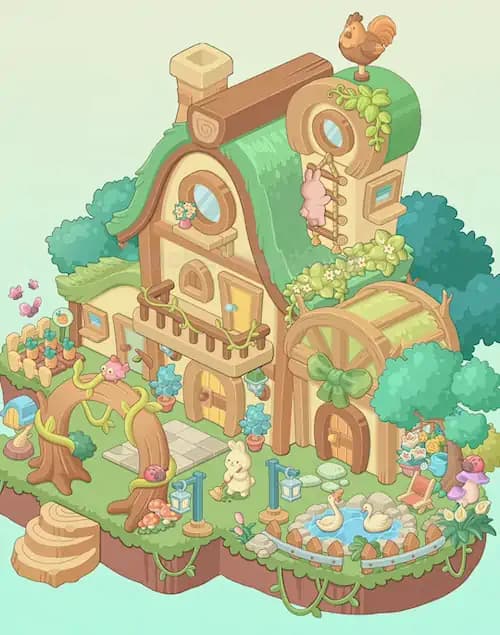
Dreamy Room Level 811
Dreamy Room Level 811 guide - Dreamy Room 811 Walkthrough & Solution.
Important Notice Regarding Level Numbering
Due to frequent changes in Dreamy Room's level numbering and differences between platforms (Android/iOS) – for example, level 811 on Android might not be the same as level 811 on iOS – the text guide below may not always match the images and video above. Please prioritize the image and video guides. If you find that the guide content doesn't match your current level, please visit the All Level Walkthroughs page to find the correct guide based on level images. Thank you for your understanding.
Dreamy Room Level 811 Walkthroughs & Guide
Step 1. Set Up the Entrance and Outdoor Patio in Dreamy Room Level 811
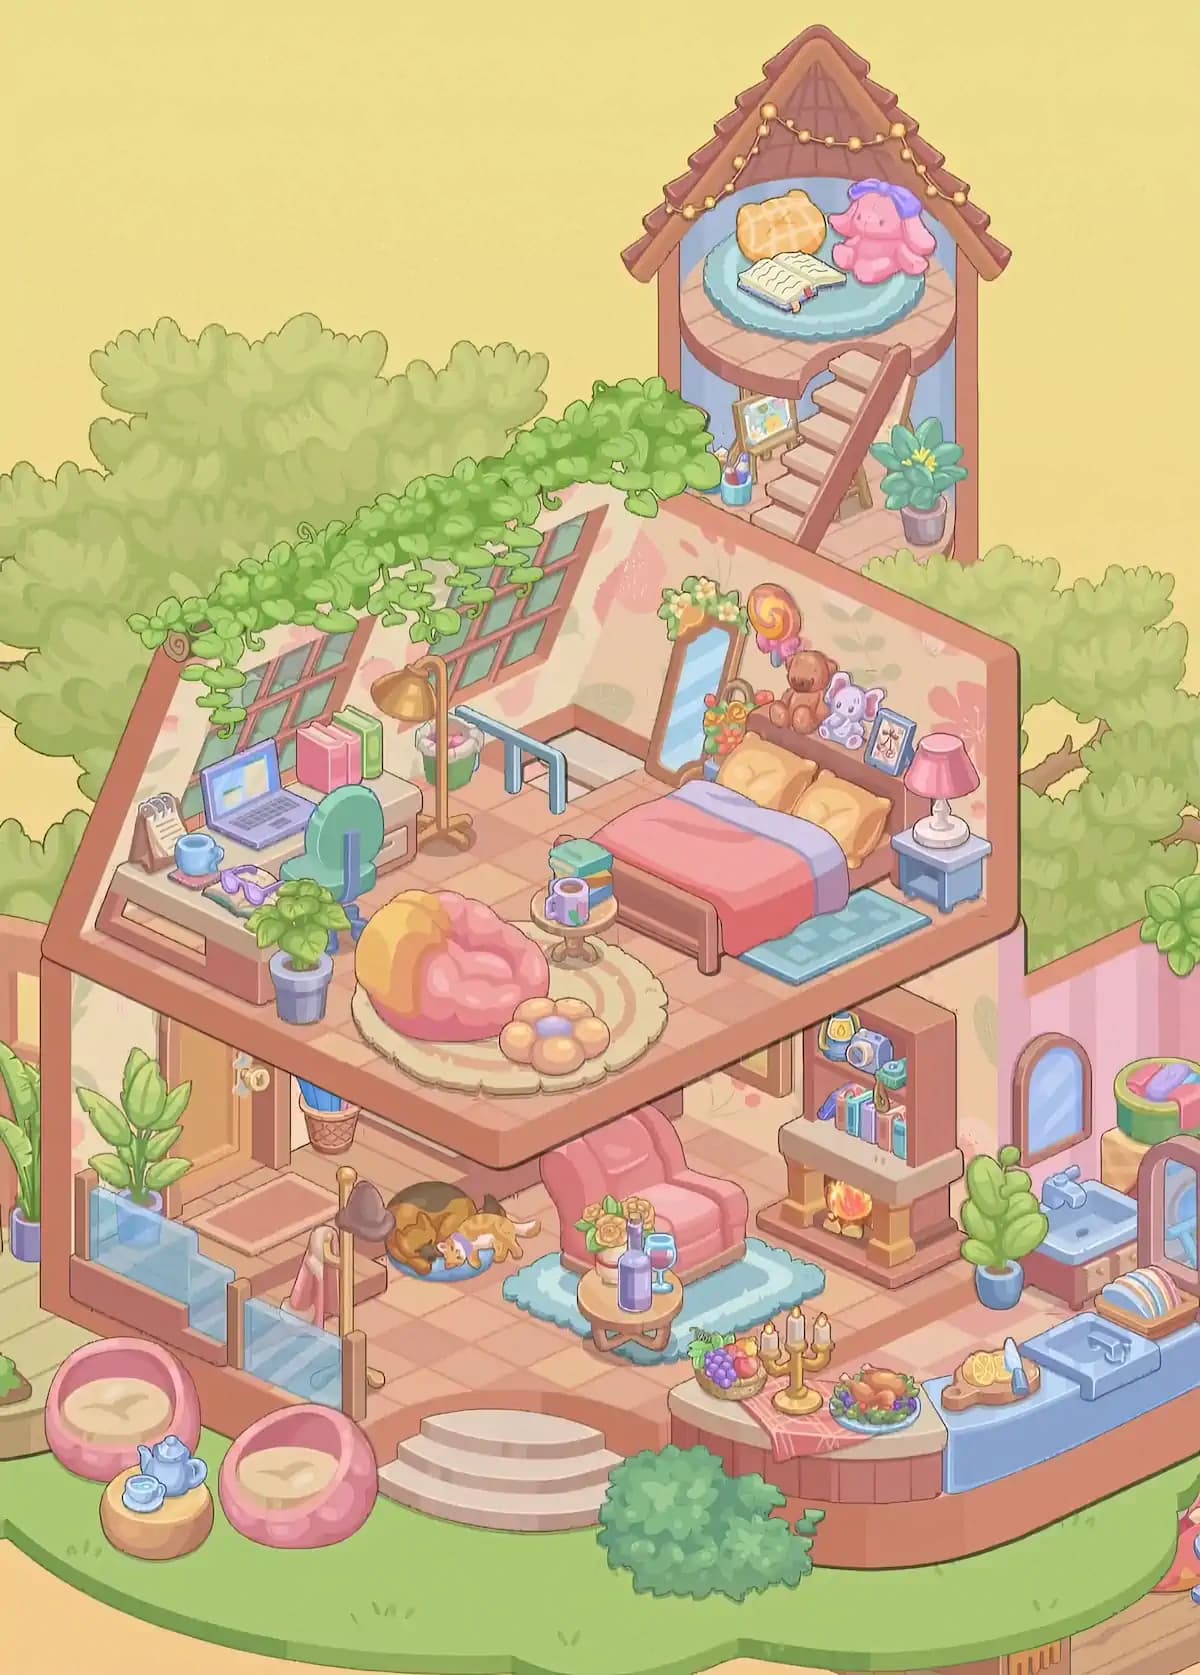
Begin Dreamy Room Level 811 around the lower-left entrance and front lawn because these objects are easy to distinguish and establish the front edge of the house. The main entrance sits on the left side of the ground floor behind a short blue-tinted glass partition. Place the rectangular doormat directly inside the wooden door and put a large leafy potted plant beside the doorway. A wicker holder containing a blue umbrella belongs deeper inside near the wall. In front of the glass partition, position the tall wooden coat stand, hanging the brown hat near its top and the pink garment or umbrella from one of its hooks. Outside, arrange two round pink lounge chairs with cream-colored seat cushions on the grass. Set the small yellow round table between them and place the blue teapot and matching cup on top. Keep the curved three-step staircase centered along the front opening, with bushes and surrounding greenery filling the exterior edges.
Step 2. Build the Ground-Floor Living Area in Dreamy Room Level 811
Move into the center of the lower floor and establish the main sitting area. Place the soft aqua-blue rectangular rug slightly right of center, then position the large pink armchair squarely on its upper half. In front of the chair, add the low circular wooden table. The tabletop holds a vase of peach-colored flowers, a tall purple bottle, and a stemmed glass filled with a reddish drink. This arrangement is especially important in Dreamy Room Level 811, because the small table can appear suitable for several decorative items but these three objects belong together here. To the left of the chair, beneath the edge of the upper floor, put the round blue pet cushion and place the curled brown dog and orange-and-white cat together on it. Leave an open walkway between the pet bed, the front steps, and the armchair. The result should feel like a compact lounge centered between the entrance on the left and fireplace on the right.
Step 3. Assemble the Fireplace and Display Shelf
Place the brick fireplace against the right side of the ground-floor living space, immediately beside the pink armchair. The firebox should face forward with the burning logs visible, while the wide pale mantel forms the base for the tall reddish-brown shelving unit above it. On the top shelf, arrange the small yellow decorative item toward the left, the blue camera near the center, and the small green object toward the right. The lower shelf holds a row of colorful upright books, with the small blue accessory tucked toward the left and the narrow decorative object rising among the books. Correct shelf placement matters in Dreamy Room Level 811 because these tiny pieces can easily be mistaken for desk or bedroom accessories. The fireplace should sit close enough to visually anchor the armchair but should not overlap its rug. Keep the shelving unit directly centered over the mantel so that the whole fireplace reads as one tall feature.
Step 4. Complete the Kitchen and Dining Counter in Dreamy Room Level 811
The front-right corner becomes the food-preparation and dining zone. Start with the long blue kitchen counter that follows the outer edge of the house. Install the large sink basin toward the right and place the rack of neatly stacked plates behind it. On the counter section to the left of the sink, set the wooden cutting board with two lemon slices and the kitchen knife. Beside this blue counter is the curved dining counter facing the living room. Drape the red checked table runner diagonally over its surface. Place the fruit basket containing purple grapes and other fruit toward the left, the golden three-arm candleholder in the middle, and the large platter of roasted food surrounded by colorful vegetables toward the right. In Dreamy Room Level 811, this crowded counter is a useful visual checkpoint: the candles should stand between the fruit and the cooked dish rather than beside the kitchen sink, while the cutting board, lemons, and knife belong exclusively on the blue preparation counter.
Step 5. Finish the Sink, Laundry, and Plant Corner
Behind the kitchen counter, against the right wall, create the smaller utility area. Place the compact blue washbasin below the arched blue wall opening or mirror. Its faucet points inward over the basin, and the cabinet underneath faces the room. Immediately to its left, add the large leafy green plant in the blue pot so it fills the narrow gap between the wash area and fireplace. To the far right and slightly behind the basin, stack the green laundry basket on the yellow container and fill the basket with the visible pink and lavender folded clothing. This portion of the house is one of the easier areas to misread because Dreamy Room Level 811 contains both a kitchen sink in the foreground and this smaller sink against the wall. Use the arched opening as your reference: the small basin belongs directly beneath it, whereas the larger sink and dish rack stay on the front blue counter. Keep every utility object behind the food-preparation zone.
Step 6. Place the Upstairs Bed and Bedroom Decorations in Dreamy Room Level 811
On the upper floor, begin with the bed because it is the largest positional anchor. Put the brown-framed bed against the right wall with its headboard at the back and foot facing toward the front-left. Arrange two yellow pillows against the headboard, then cover the mattress with the coral-pink duvet and its wide lavender band near the pillows. A narrow blue rug runs along the bed's right and lower side. Set the small blue nightstand directly beside the right side of the headboard and place the pink-shaded table lamp on it. Along the top of the wooden headboard, position the floral decoration at the left, the brown teddy bear near the center, the pale purple bunny plush beside it, and the small framed picture near the lamp side. Behind the bed, lean the tall mirror against the back wall, decorating its top with the flower garland. The colorful spiral lollipop ornament belongs near the mirror and headboard display.
Step 7. Arrange the Upstairs Study Desk and Workstation
Fill the long desk along the upper-left wall next. The open laptop sits near the center-left of the tabletop, directly in front of the green rounded desk chair. Place the standing notepad or flip-style calendar at the far-left rear corner, then position the blue cup on its small reddish coaster nearby. A small purple accessory rests along the front portion of the desk. To the right of the laptop, arrange the upright books in pink and green. The tall golden floor lamp stands immediately to the right of the desk, curving its shade over the workspace. Behind the lamp and beside the stair opening, place the small green container holding the pink fabric or soft item. A leafy plant in a blue-gray pot belongs on the floor at the front-left corner of this room. Dreamy Room Level 811 uses the desk area to test precise placement, so avoid moving any of these accessories onto the bedside table or central coffee table even when their sizes appear compatible.
Step 8. Create the Upstairs Relaxation Corner in Dreamy Room Level 811
The open center of the upstairs room becomes a softer lounging area. Lay the large cream circular rug on the floor in front of the desk and to the left of the bed. Its curved peach-colored stripe pattern should remain visible around the furniture. Place the large pink beanbag chair on the left half of the rug and drape the yellow throw over its upper-left side. Put the flower-shaped floor cushion at the front-right edge of the rug, with its warm orange petals surrounding the lavender center. Next to the bed, place the tiny round pedestal table. A short stack of green and blue books sits beside or just behind it, while the purple mug rests on top of the table. The spacing is important in Dreamy Room Level 811: the beanbag should not block the study chair, and the flower cushion remains on the rug rather than next to the bed. Preserve a clear route from this lounge area toward the stairs at the rear.
Step 9. Finish the Upstairs Walls, Windows, Stair Opening, and Greenery
With the major furniture installed, complete the architectural details of the upper level. The long angled wall on the left contains several slanted window panels, and thick trailing green vines spread across the exterior roofline above them, hanging down around the windows. The floral-patterned wallpaper remains visible behind the desk and bed. At the rear center, leave the stair opening unobstructed and place the blue railing around its exposed edge. The tall mirror behind the bed should angle naturally against the wall without covering the stair space. This stage of Dreamy Room Level 811 is mostly about checking negative space: there should still be visible floor between the desk, beanbag rug, stair opening, and bed. The upper floor is intentionally busy, but nothing should appear piled randomly. Confirm the potted plant remains near the desk corner, the lamp remains between desk and stairwell, and the bed's blue rug stays entirely on the right side.
Step 10. Build the Rooftop Stair Landing in Dreamy Room Level 811
The small tower rising from the back-right of the bedroom has its own miniature landing before the final reading platform. Position the wooden staircase diagonally upward from the lower-right side of the tower toward the circular platform. At the bottom-left of these stairs, set the small artist's easel with the colorful painting facing outward. Place the blue cup filled with brushes and art supplies directly beside the easel. On the opposite side of the staircase, place the flowering green plant in its purple pot. These objects are easy to overlook in Dreamy Room Level 811 because they occupy a very narrow area above the main bedroom, but all three are required for the completed composition. Keep the easel and brush cup together on the left and the plant alone on the right. The staircase itself should remain visually clear through the center, connecting the upper bedroom level to the round reading nook above.
Step 11. Complete the Rooftop Reading Nook in Dreamy Room Level 811
Finish the level at the highest point of the house. The tower's upper platform is round and sheltered by a steep reddish-brown triangular roof. Lay the scalloped circular blue rug across the middle of the wooden platform. Place the yellow checked cushion toward the back-left of the rug, then set the open book in front of it with the pages facing toward the stairs. The pink floppy-eared plush toy wearing the purple sleeping cap belongs on the right side of the rug. Finally, stretch the glowing string lights beneath the roof, allowing them to curve across the triangular interior and down both sides. This tiny retreat is the final major placement test in Dreamy Room Level 811. The book, cushion, and plush should form a compact triangular group rather than being spread around the platform, while the lights stay attached to the roof structure rather than lying on the floor.
Step 12. Add the Final Exterior Greenery and Check Every Zone
Before finishing Dreamy Room Level 811, compare the entire house from top to bottom. Dense trees and soft green bushes surround the building, with trailing plants framing the roof and additional vegetation appearing along both exterior sides. A rounded bush fills the grass directly in front of the central steps. The lawn forms a continuous green platform around the house, while the two outdoor pink chairs and tea table remain grouped on its front-left section. Check that the glass entrance partition stays visible, the coat stand remains inside the lower room, and the outdoor furniture does not drift into the entrance path. Inside, verify that the living-room rug, armchair, pet cushion, fireplace, kitchen counters, and utility sink are all separated into their intended zones. Upstairs, confirm the desk, circular lounge rug, bed, stairs, and rooftop retreat remain distinct. The main challenge is exact object placement, so even a small decorative piece in the wrong zone can prevent completion.
Notes and Precautions
The most important rule in Dreamy Room Level 811 is to place objects according to functional clusters rather than simply looking for any open surface. There are several cups, books, plants, tables, sinks, cushions, and decorative accessories, so visual similarity can cause mistakes. The upstairs blue mug belongs on the desk, while the purple mug belongs on the tiny table near the bed. The outdoor tea cup stays with the blue teapot. Likewise, the kitchen sink with the dish rack is different from the smaller wall-mounted sink beside the plant and laundry basket.
Be especially careful with miniature decorations. The camera and books above the fireplace must stay on their shelving unit; the teddy bear, bunny, framed picture, and floral decorations belong around the headboard; and the art supplies belong at the rooftop stair landing. Keep the pet pair together on the blue floor cushion rather than near the outdoor seating.
Work from large furniture to small accessories whenever possible. Bed, desk, armchair, fireplace, kitchen counters, rugs, and stairs provide reliable reference points. Once those are correctly positioned, the smaller pieces have far fewer plausible locations. Since the game allows a calm, untimed approach, there is no benefit to rushing through the dense decorative sections. dreamy room instruction
Tips and Tricks from top player
A strong strategy for Dreamy Room Level 811 is to divide the finished house into six visual zones: outdoor patio, ground-floor living room, kitchen/utility corner, upstairs study, upstairs bedroom/lounge, and rooftop retreat. Completely finish one zone before moving to the next. This reduces the number of loose objects on screen and makes unusual pieces much easier to identify.
Use distinctive anchor objects first. The fireplace immediately identifies the right side of the living room; the laptop identifies the upstairs desk; the coral bed fixes the bedroom orientation; the blue kitchen counter establishes the front-right edge; and the staircase determines the rooftop tower. Then use nearby empty spaces to infer smaller placements.
Another useful shortcut is matching objects by color and scale. Tiny decorative items usually sit on shelves or tables rather than directly on the floor, while rugs, plants, chairs, and larger cushions define floor-level positions. If Dreamy Room Level 811 refuses an object in a location that seems visually close, inspect nearby matching furniture instead of repeatedly dragging it around the same area. Finally, save the headboard ornaments, fireplace shelf contents, desk accessories, and rooftop art supplies for later; these compact clusters are easier once their surrounding furniture has already locked into place.
Final Scene in Dreamy Room Level 811
The completed Dreamy Room Level 811 becomes a warm miniature home wrapped in trees and trailing vines. Outside, two pink chairs and a tea table create a peaceful garden sitting area. Inside the lower floor, a pink armchair faces a flower-topped table beside two sleeping pets, while a glowing fireplace, book-filled shelves, plants, kitchen counters, fruit, candles, and a prepared meal make the room feel lived in. Upstairs, the bedroom combines a coral bed, plush toys, mirror, pink lamp, circular rug, beanbag chair, flower cushion, study desk, laptop, books, plants, and warm lighting. A staircase then climbs to the charming rooftop hideaway, where an easel and flowers lead to a blue reading rug beneath glowing string lights. An open book, checked cushion, and pink plush toy finish the tiny retreat, giving the whole house a cozy storybook atmosphere.